Effective Width |
  
|
Effective Width |
|
The effective width of a floor slab is critical to the design of a Steel Composite beam. ENERCALC for Revit automatically detects effective width using the physical geometry of the Revit model.
During launch of the calculation, the launch window will show an additional tab for managing the effective width conditions:
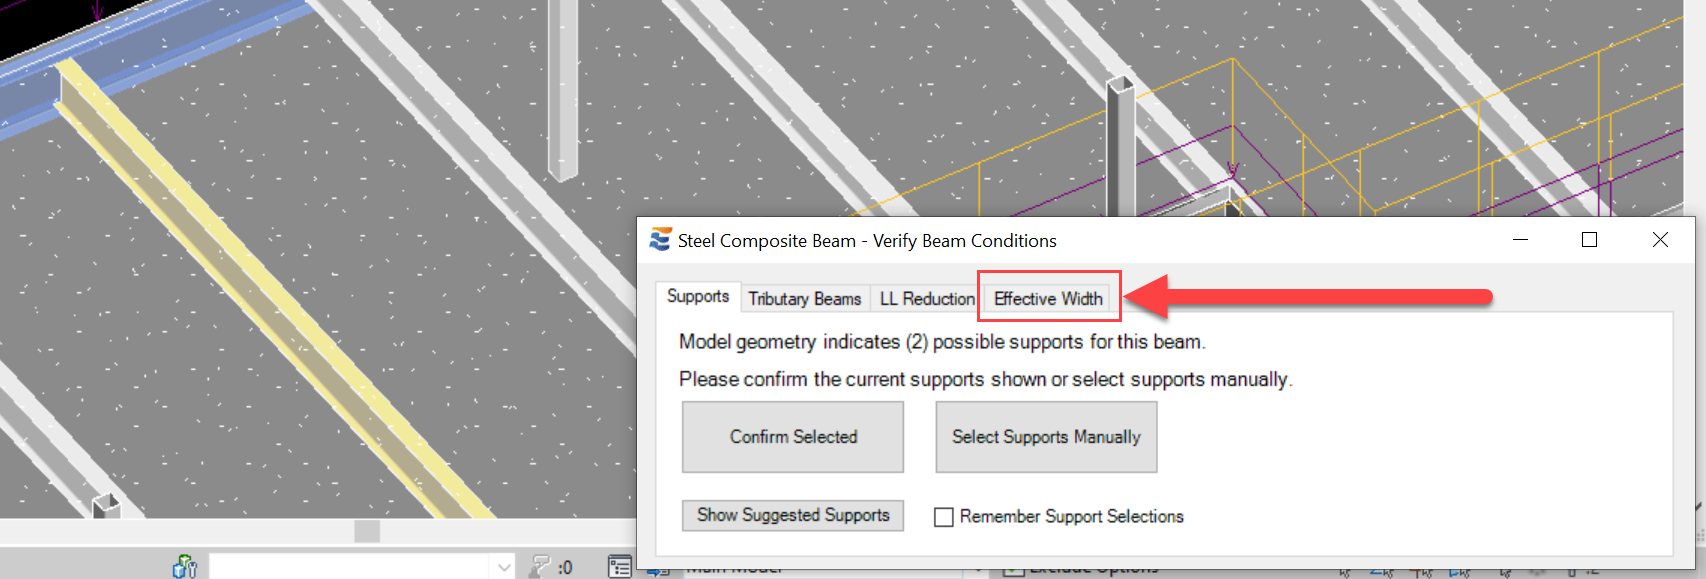
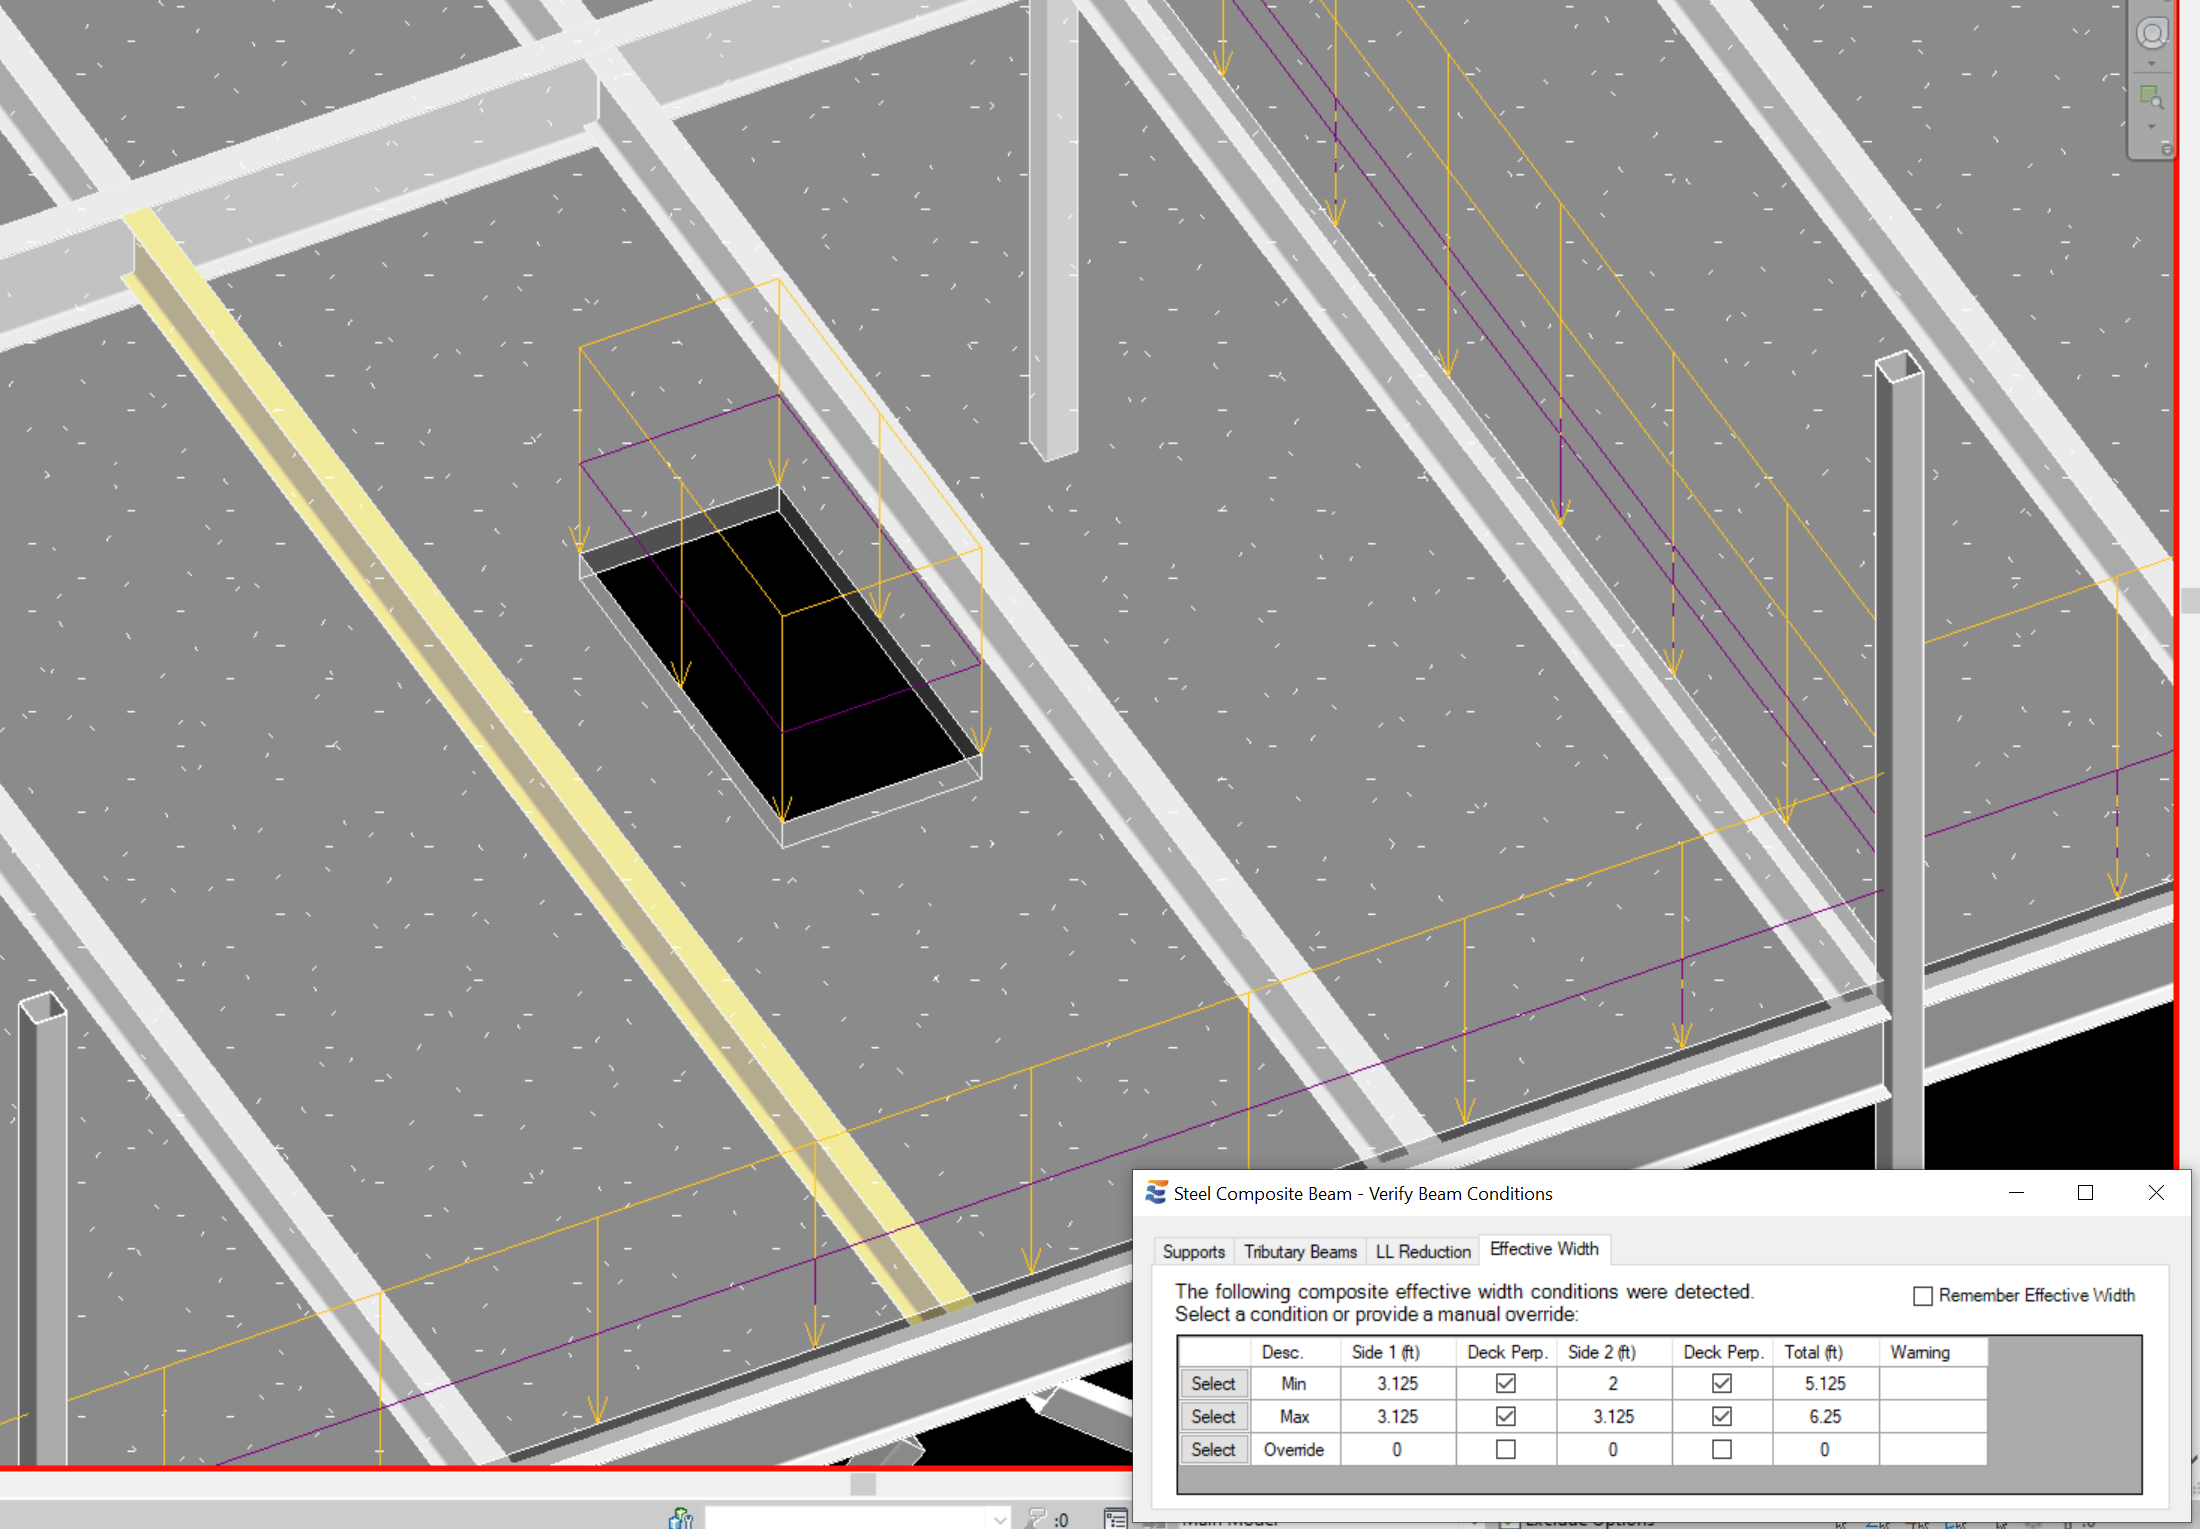
After the preceding tabs' approvals are completed, the beam effective width will be computed and presented to the user in a tabular format. The calculation will launch in ENERCALC once the user chooses an effective width condition by clicking the "Select" button on the table row that describes the desired geometry. Users should note that once the calculation has launched the effective width inputs cannot be modified from the SEL interface, since they are driven by Revit geometry.

The table presents a set of deck orientation and effective width conditions found on each side of the beam. The table rows showing auto-detected geometry are read-only and cannot be manually modified. If custom geometry is needed, refer to the procedure for using the "Override" row outlined near the end of this section.
The effective width values shown are computed from the physical geometry of the Revit model, using the minimum of the 3 criteria specified in AISC for composite beam behavior:
1.One-eighth of the beam span, center-to-center of supports
2.One-half the distance to the centerline of the adjacent beam
3.The distance to the edge of the slab
When the effective width is found to vary along the length of the beam, multiple table entries will be presented to the user:
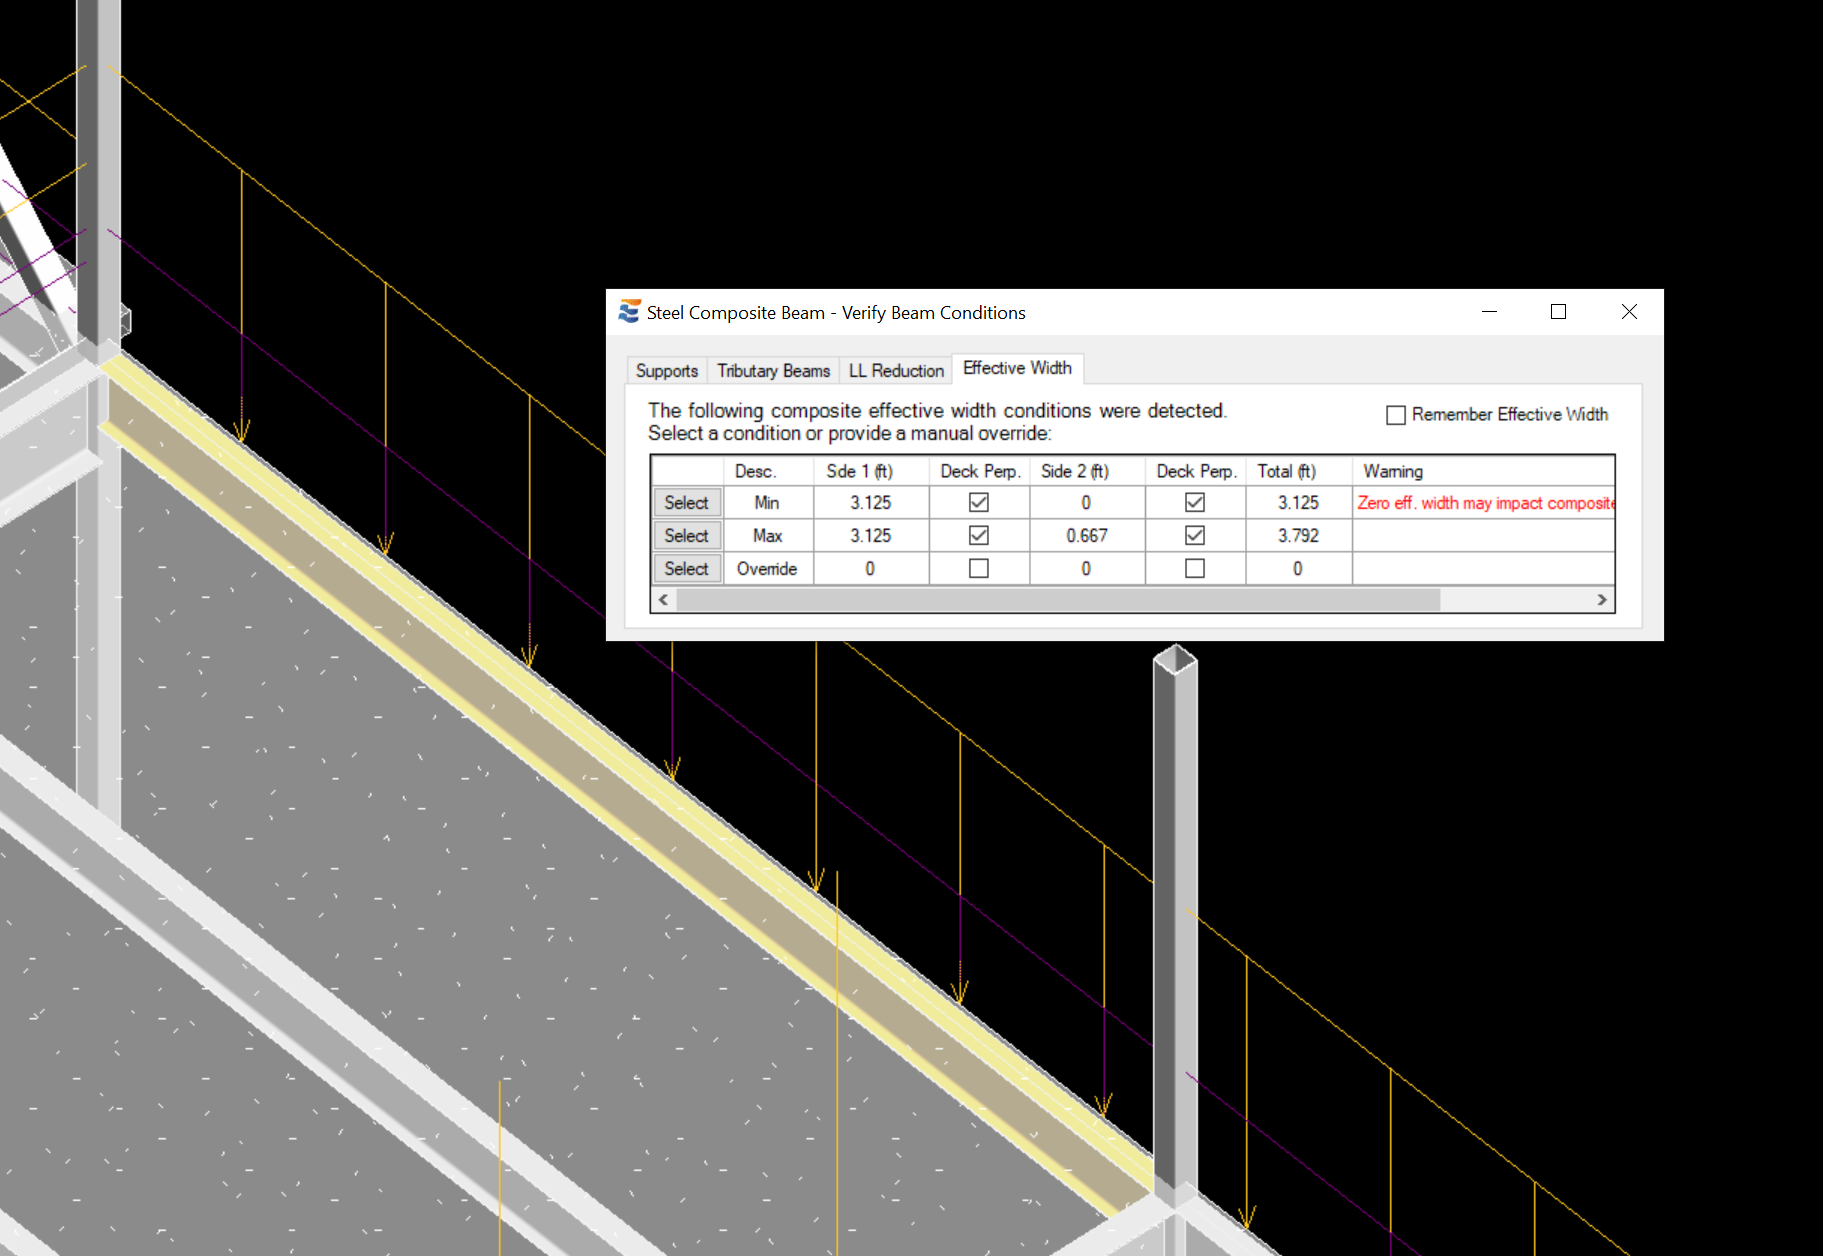
When an effective width condition is encountered which may invalidate the design, a warning is presented in the table. In the case shown here, the user is alerted that launching an edge beam calculation where 100% of the effective width falls only on one side of the beam could jeopardize the shear transfer behavior of the headed studs:
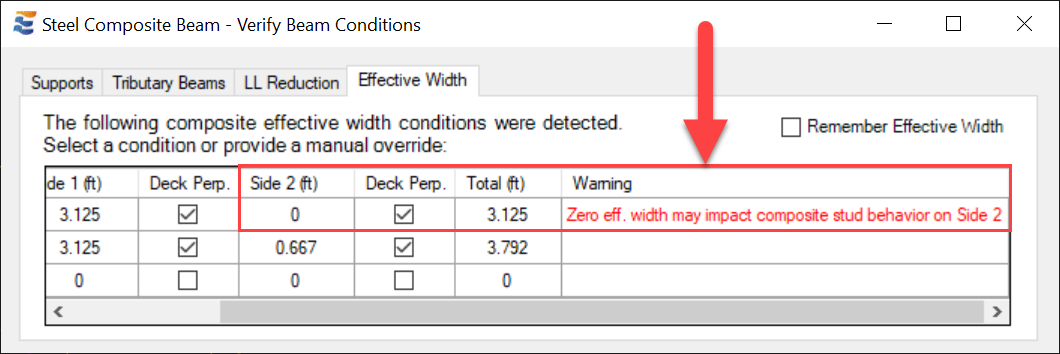
The check-boxes for "Deck Perp" on each side of the beam indicate the observed span direction of the deck. When the check-box is "checked", the deck is observed to span in any orientation NOT PARALLEL to the beam. When the check-box is "unchecked", the deck is observed to span PARALLEL to the beam. The observed span direction does not influence the design in the case of solid concrete slab without metal deck.
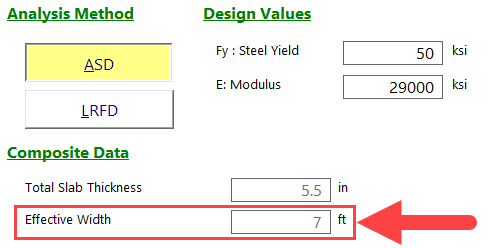
If the check-boxes for "Deck Perp" on each side of the beam are both in agreement as "checked", then the beam calculation will map to SEL as follows:

If the check-boxes for "Deck Perp" on each side of the beam are both in agreement as "unchecked", then the beam calculation will map to SEL as follows:
In either of these cases, the "Effective Width" field in SEL will indicate the "Total" value shown in the launch window table:
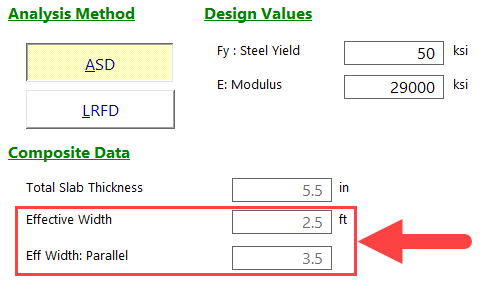
If the check-boxes for "Deck Perp" on each side of the beam are NOT in agreement, then the beam calculation will map to SEL as follows:

Under this condition, the effective width will display with the two sides individually:
Rather than choosing a calculated value from the table, the user may alternatively choose to create a custom effective width geometry using the table row labeled "Override". The input values for effective width and span direction on each side are filled manually by the user, and the total effective width updates automatically. The calculation will not launch if the "Override" row "Select" button is clicked when the total effective width is zero.
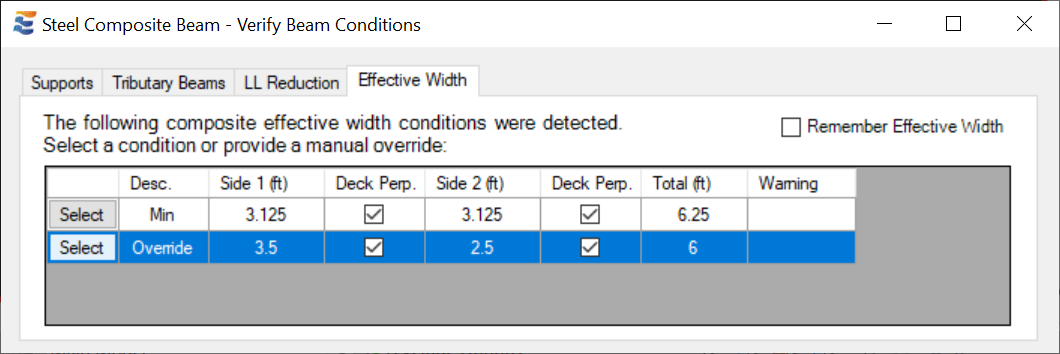
When an existing Steel Composite beam calculation is launched from Revit, the user will by default be presented with an option in the effective width table showing the effective width geometry used during the previous launch:

As with other aspects of the calculation launch process, the user may elect to "Remember" the specified tributary width conditions.
This will cause this approval step to be skipped during subsequent launches of the calculation:
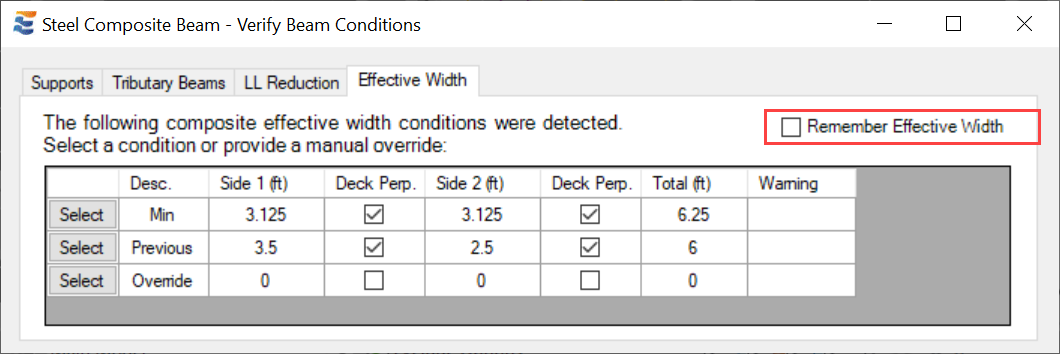
For a calculation set to "Remember Effective Width", this approval step will be skipped indefinitely on future launches until the setting is changed.
This setting may be viewed and changed from the Element Manager window. Once the "Remember" setting is toggled off and applied, the user will once again be prompted to approve the effective width during the next launch of the calculation.

 <
<