Assigning To Multiple Elements |
  
|
Assigning To Multiple Elements |
|
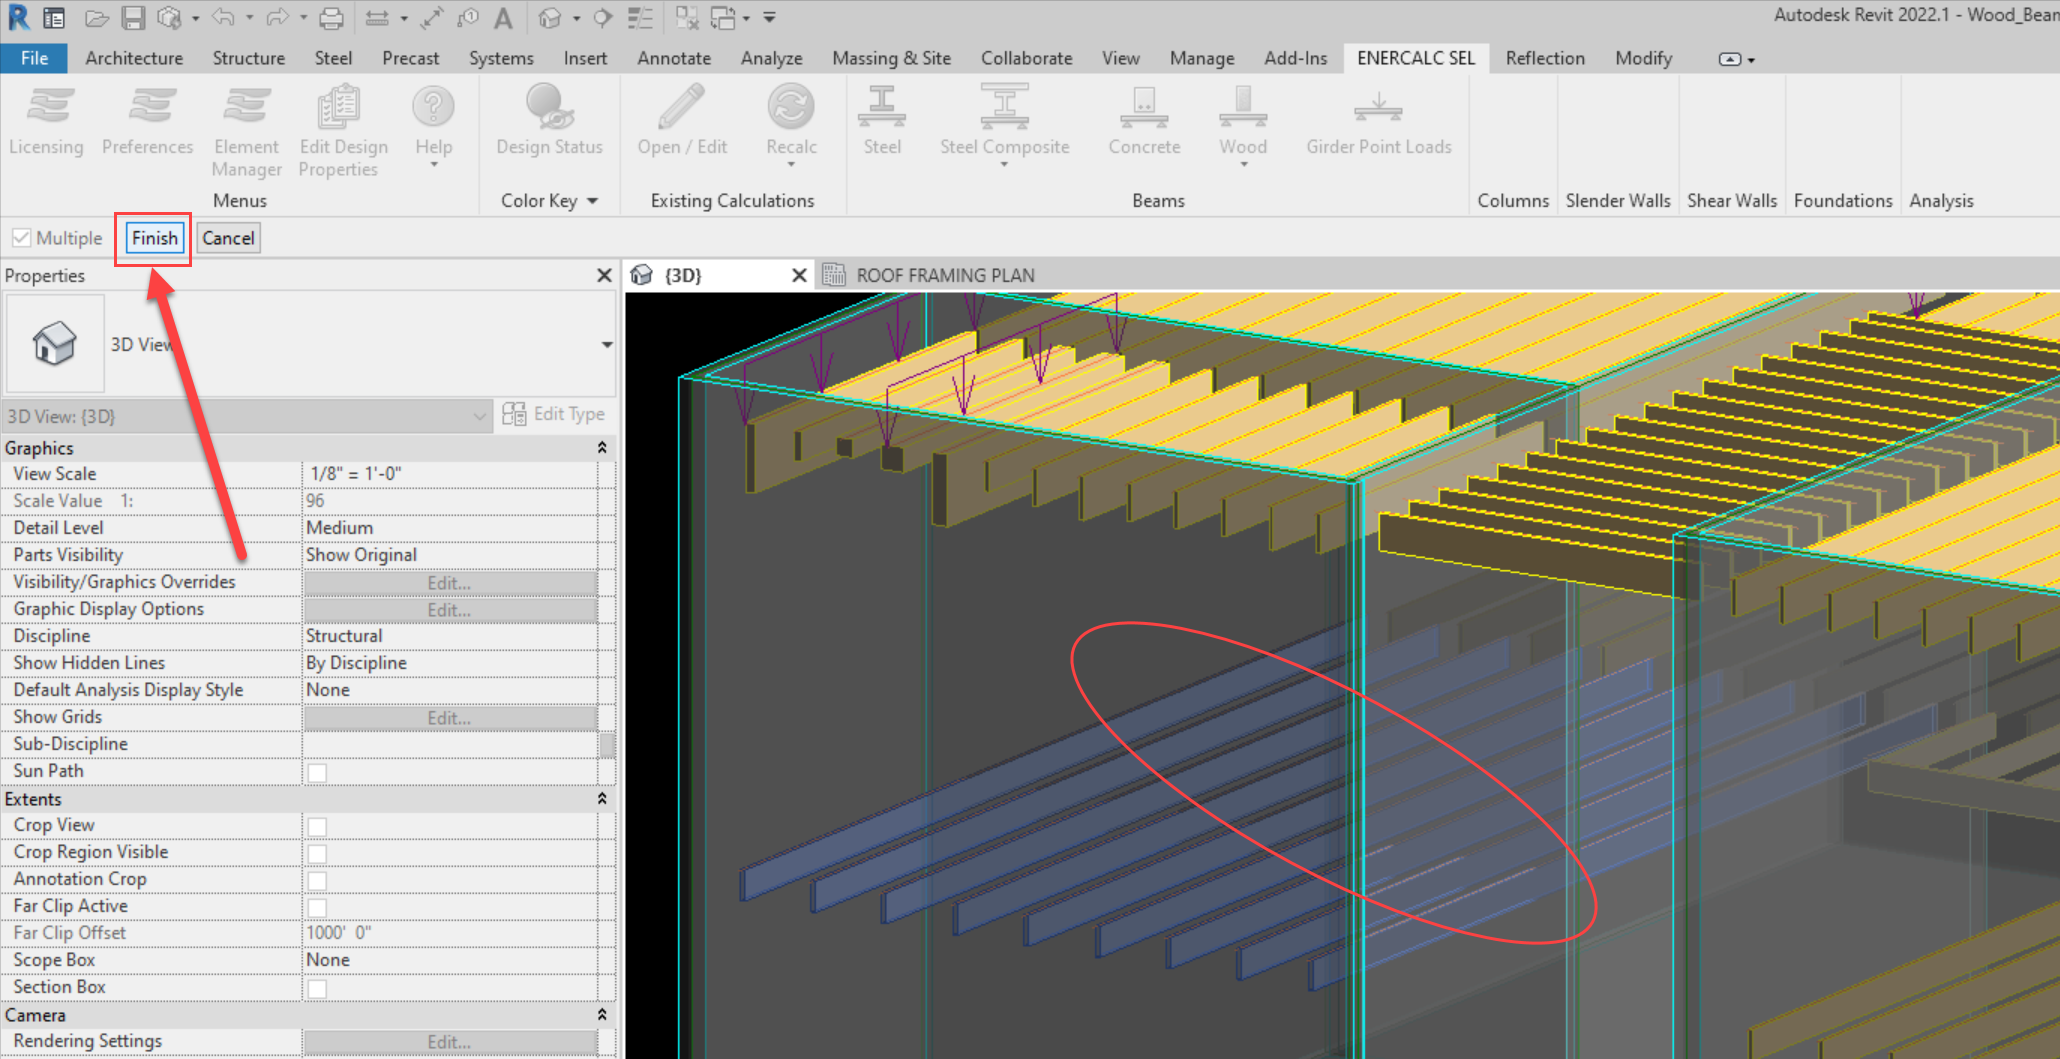
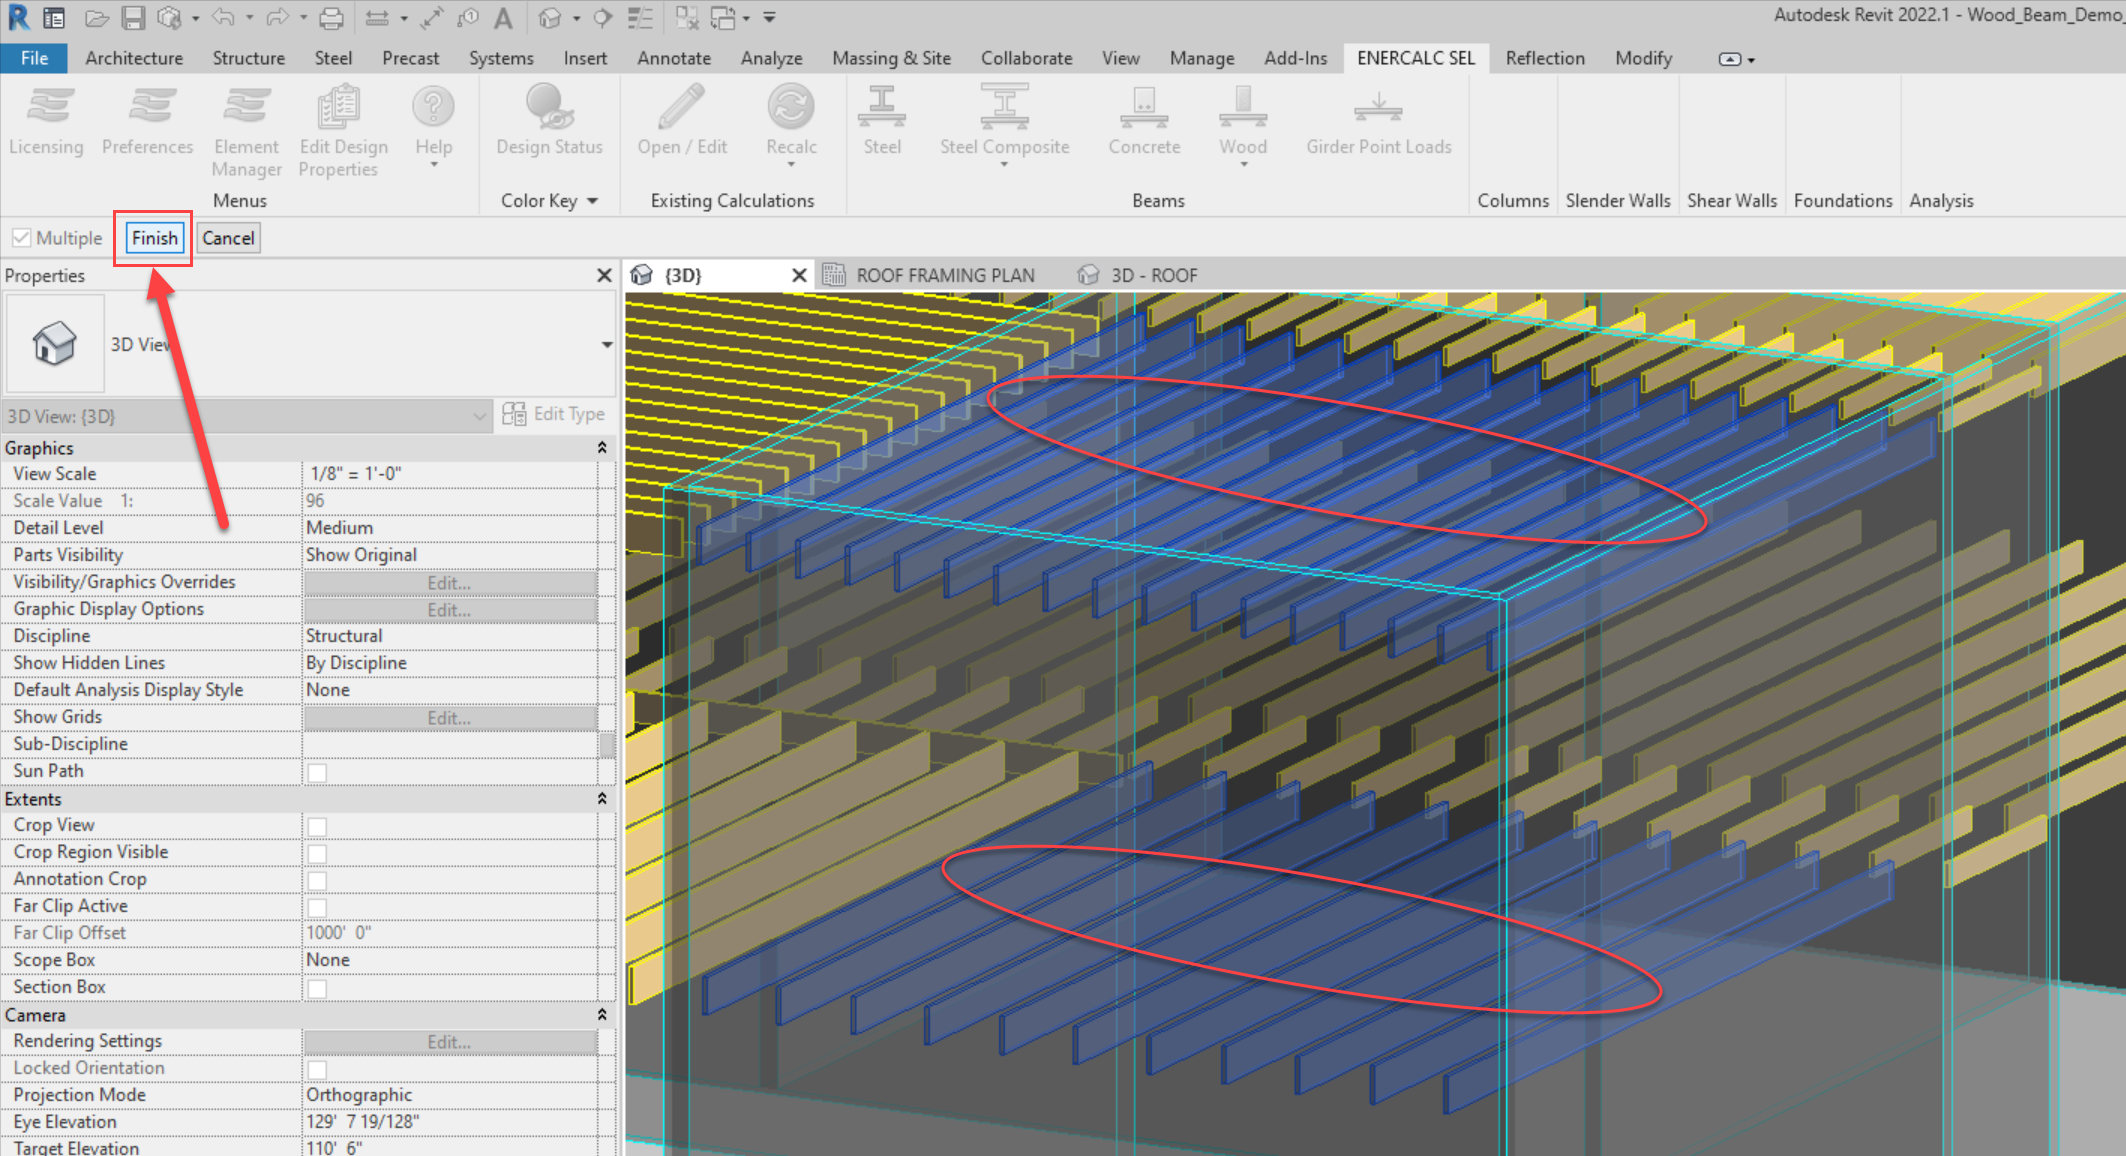
There are two different approaches for selecting multiple elements to display in the "Edit Wood Material" menu:
1.Multi-element pick + "Finish": Only the selected elements will be displayed in the edit menu.
2."Cancel": All wood beam elements found in the entire model will be displayed in the edit menu.
Regardless of whether the user opts to select all via "Cancel" or only select certain elements via picking / looping, selected elements will be displayed in the table, broken down by section sets.
If all of the selected elements share a common section size and design properties, then they will appear as a single entry in the table:
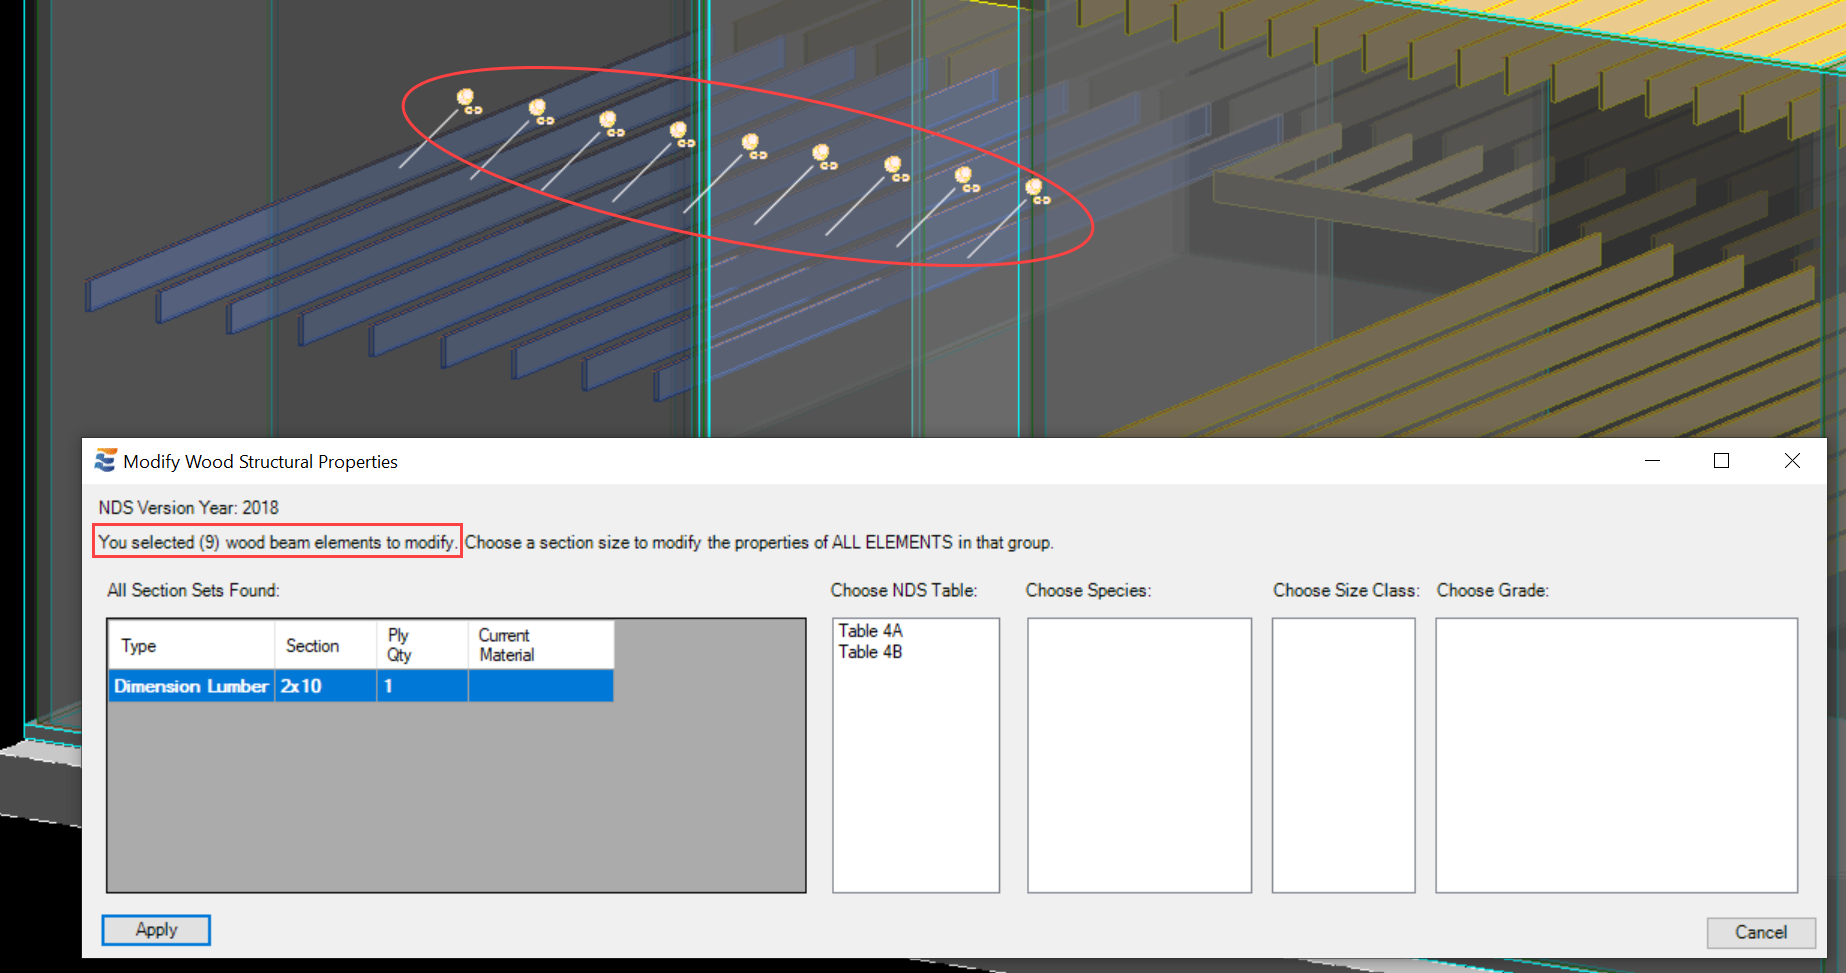
Any design properties specified in the menu will then be applied to all of the selected elements when the "Apply" button is clicked.
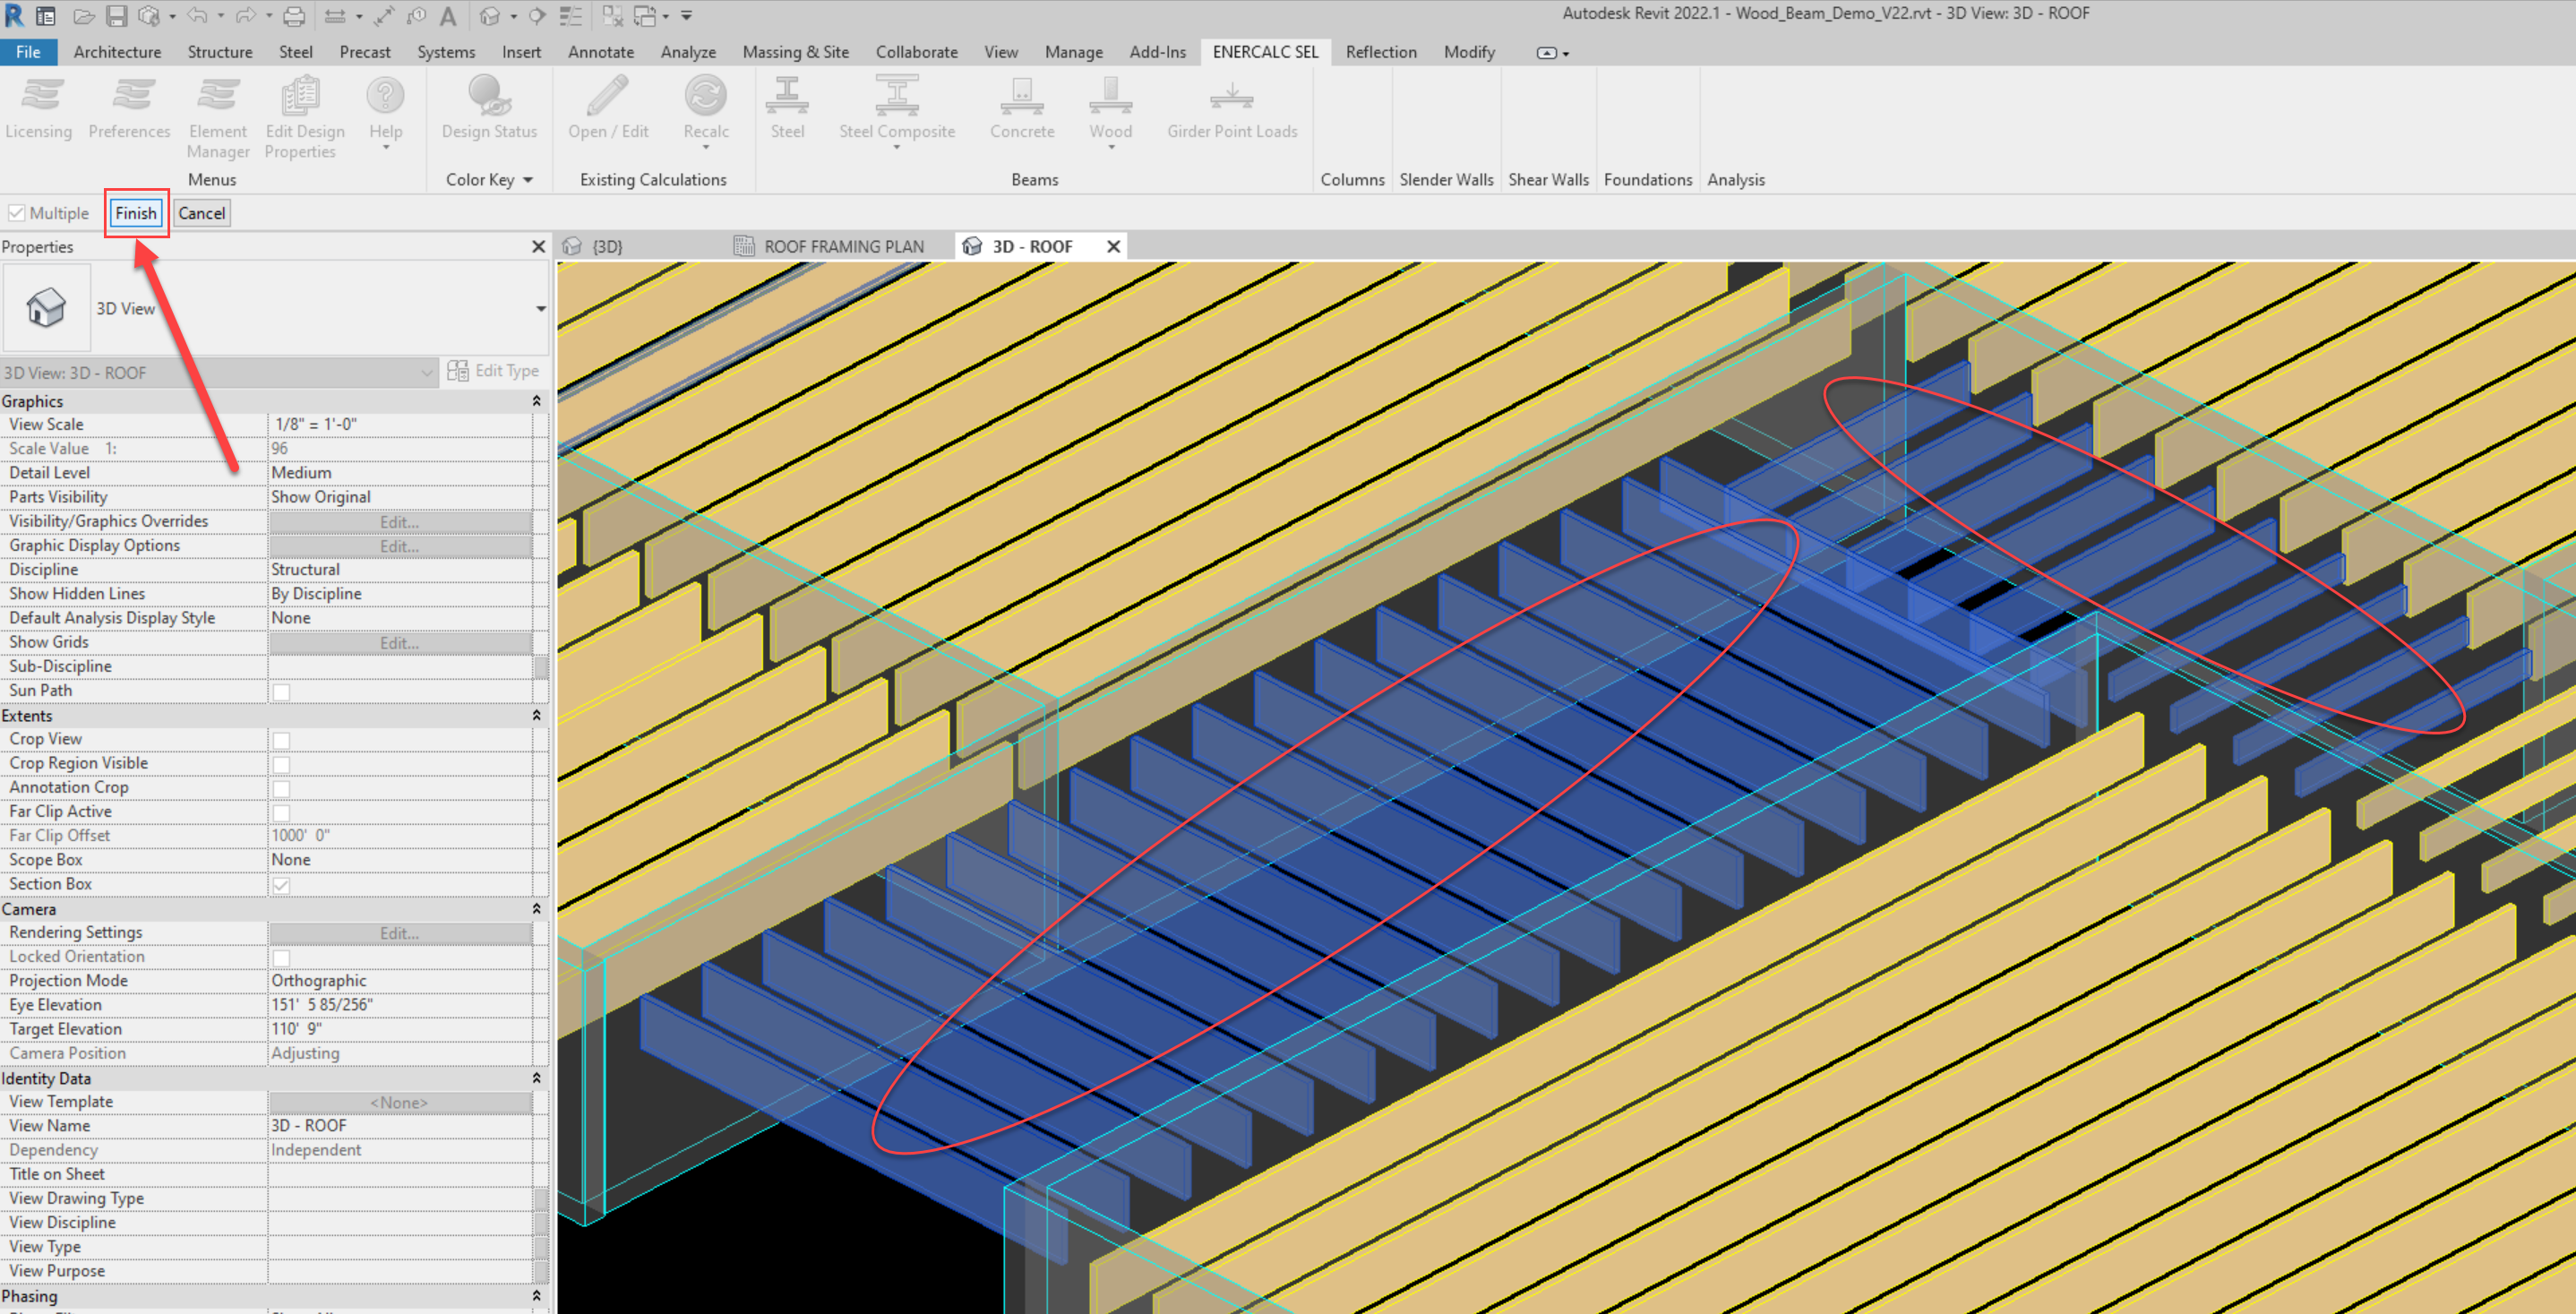
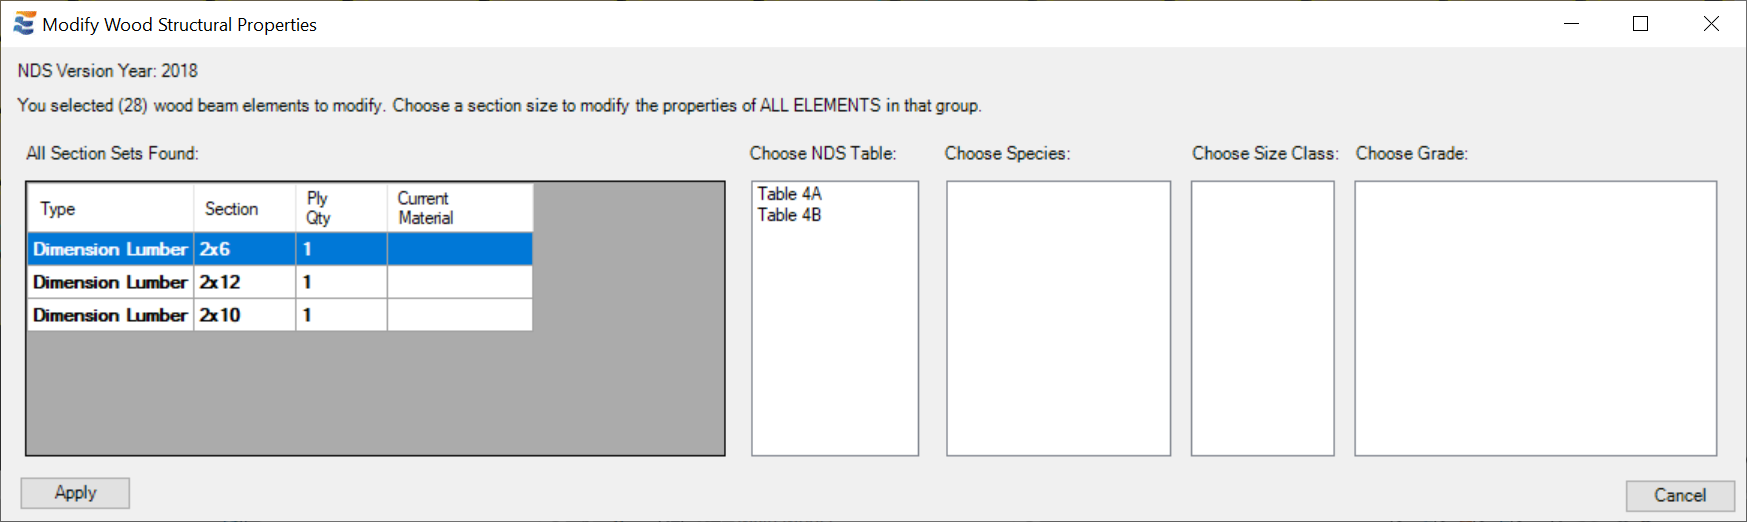
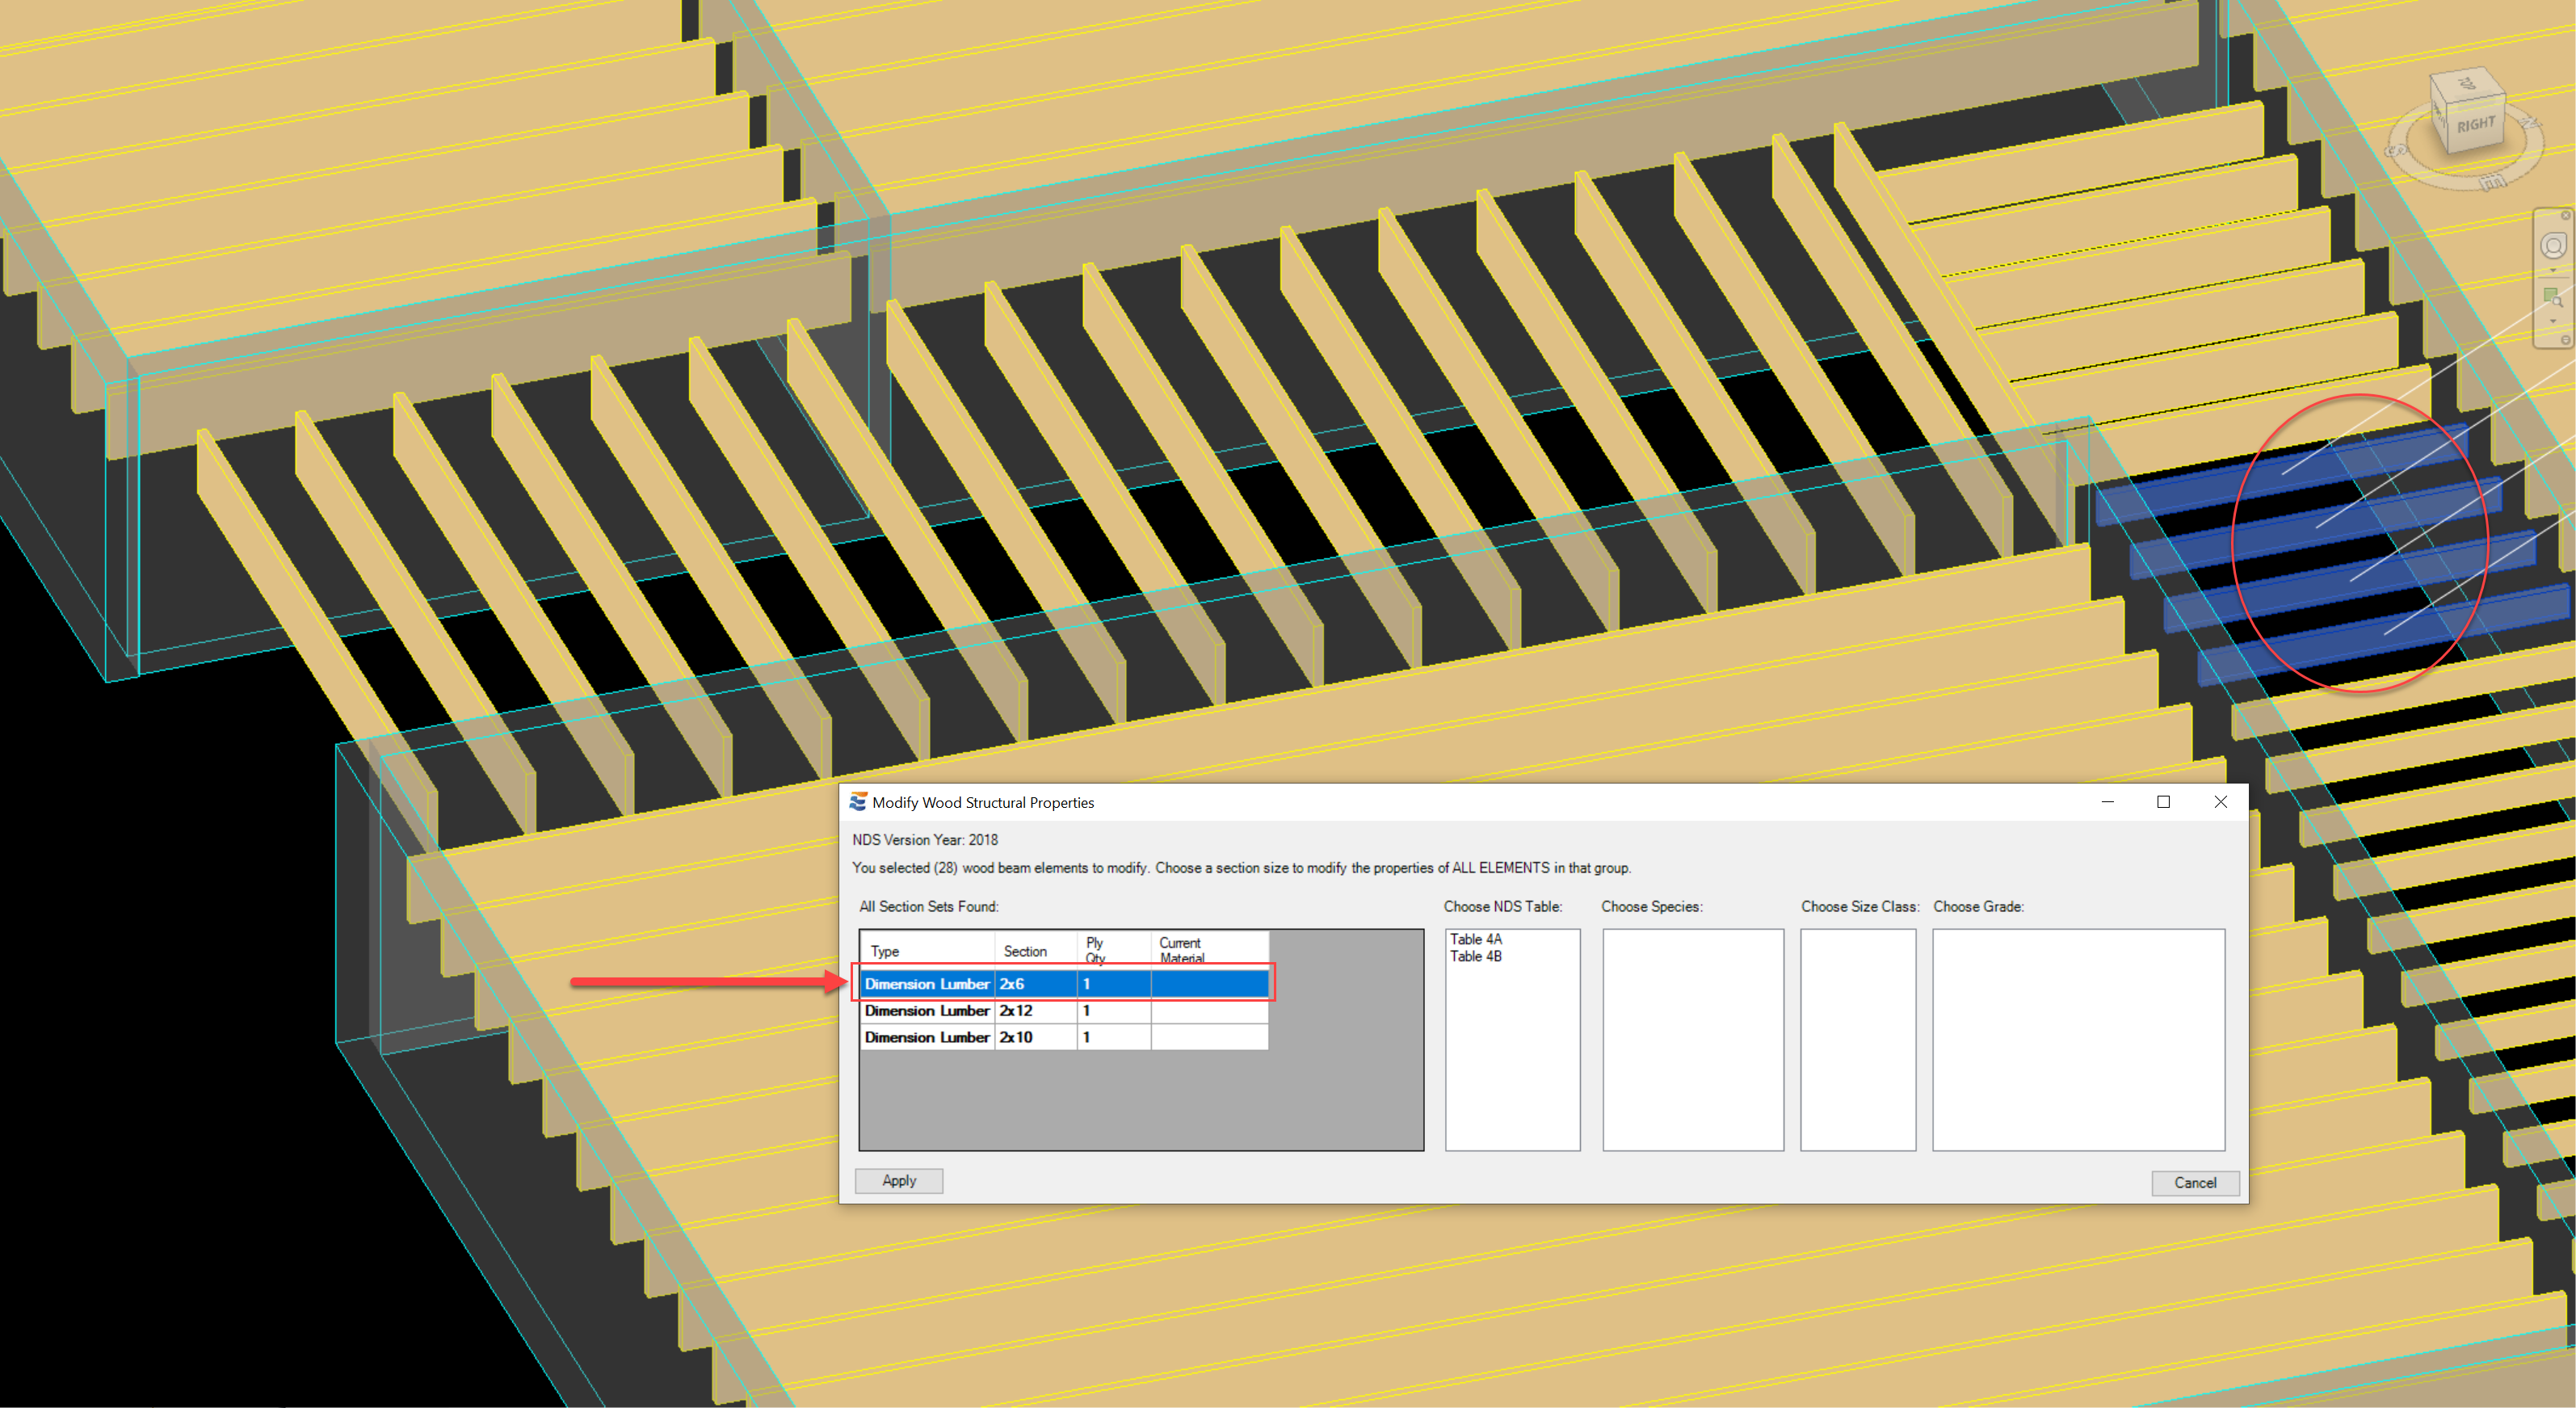
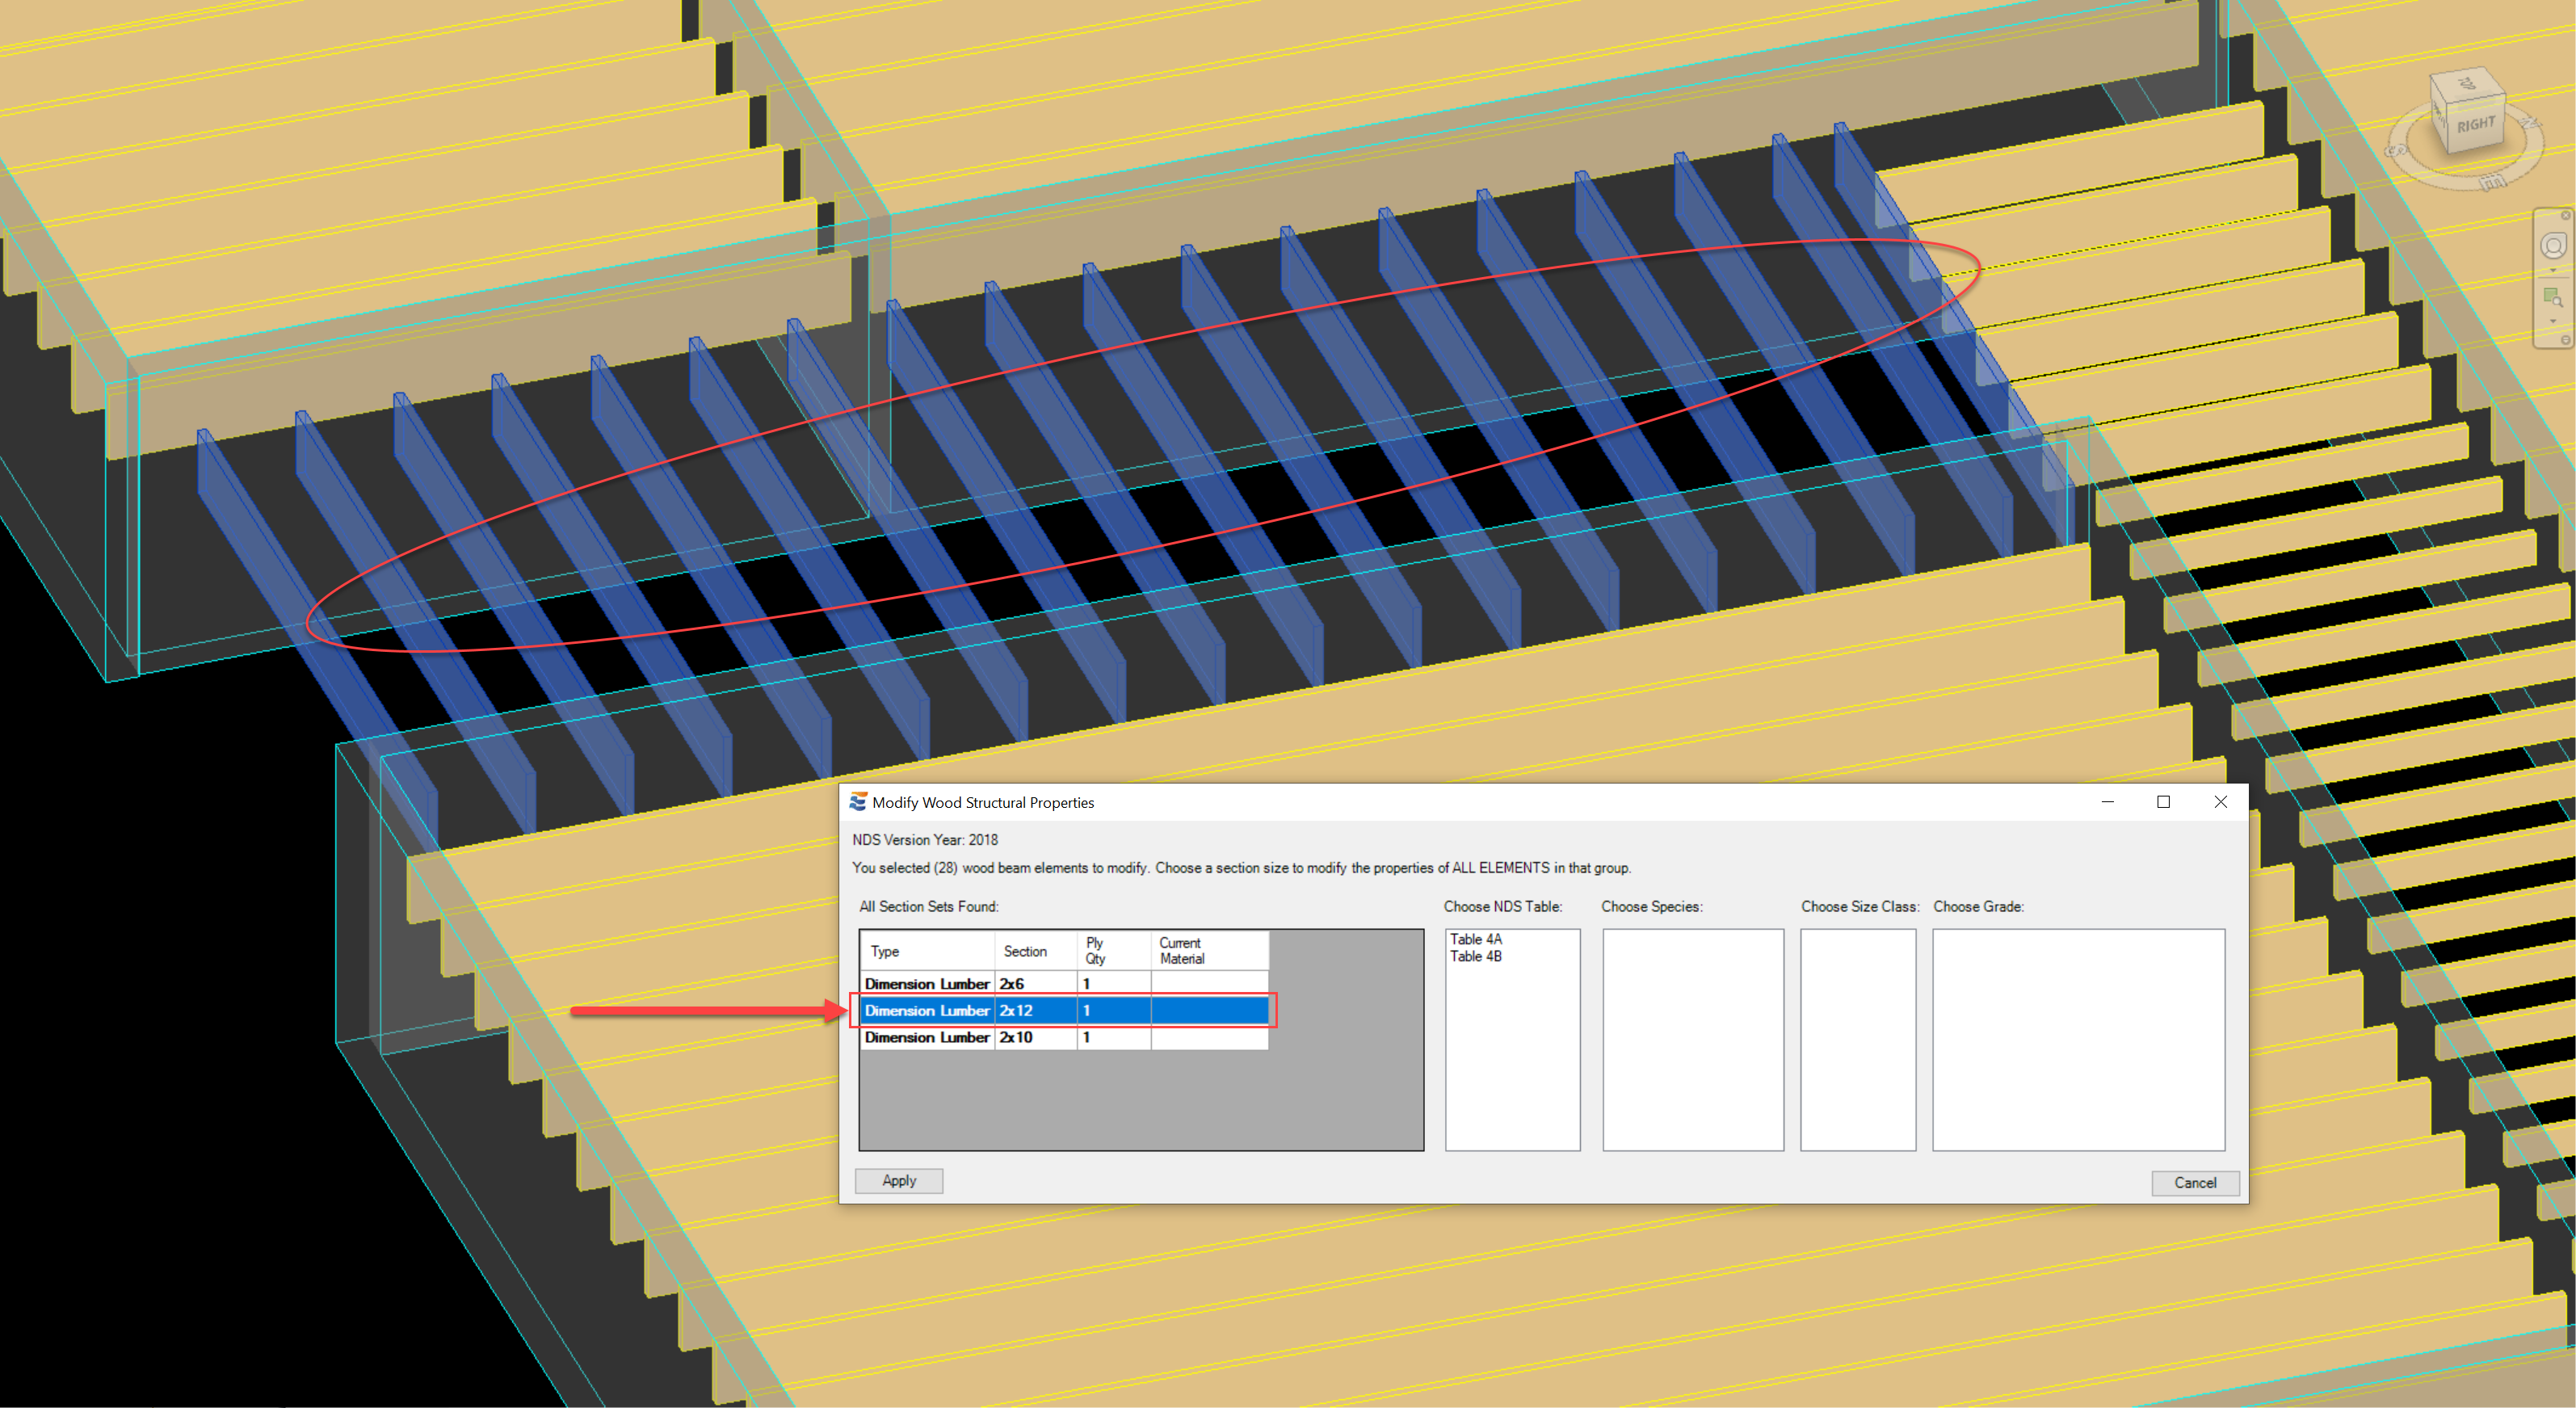
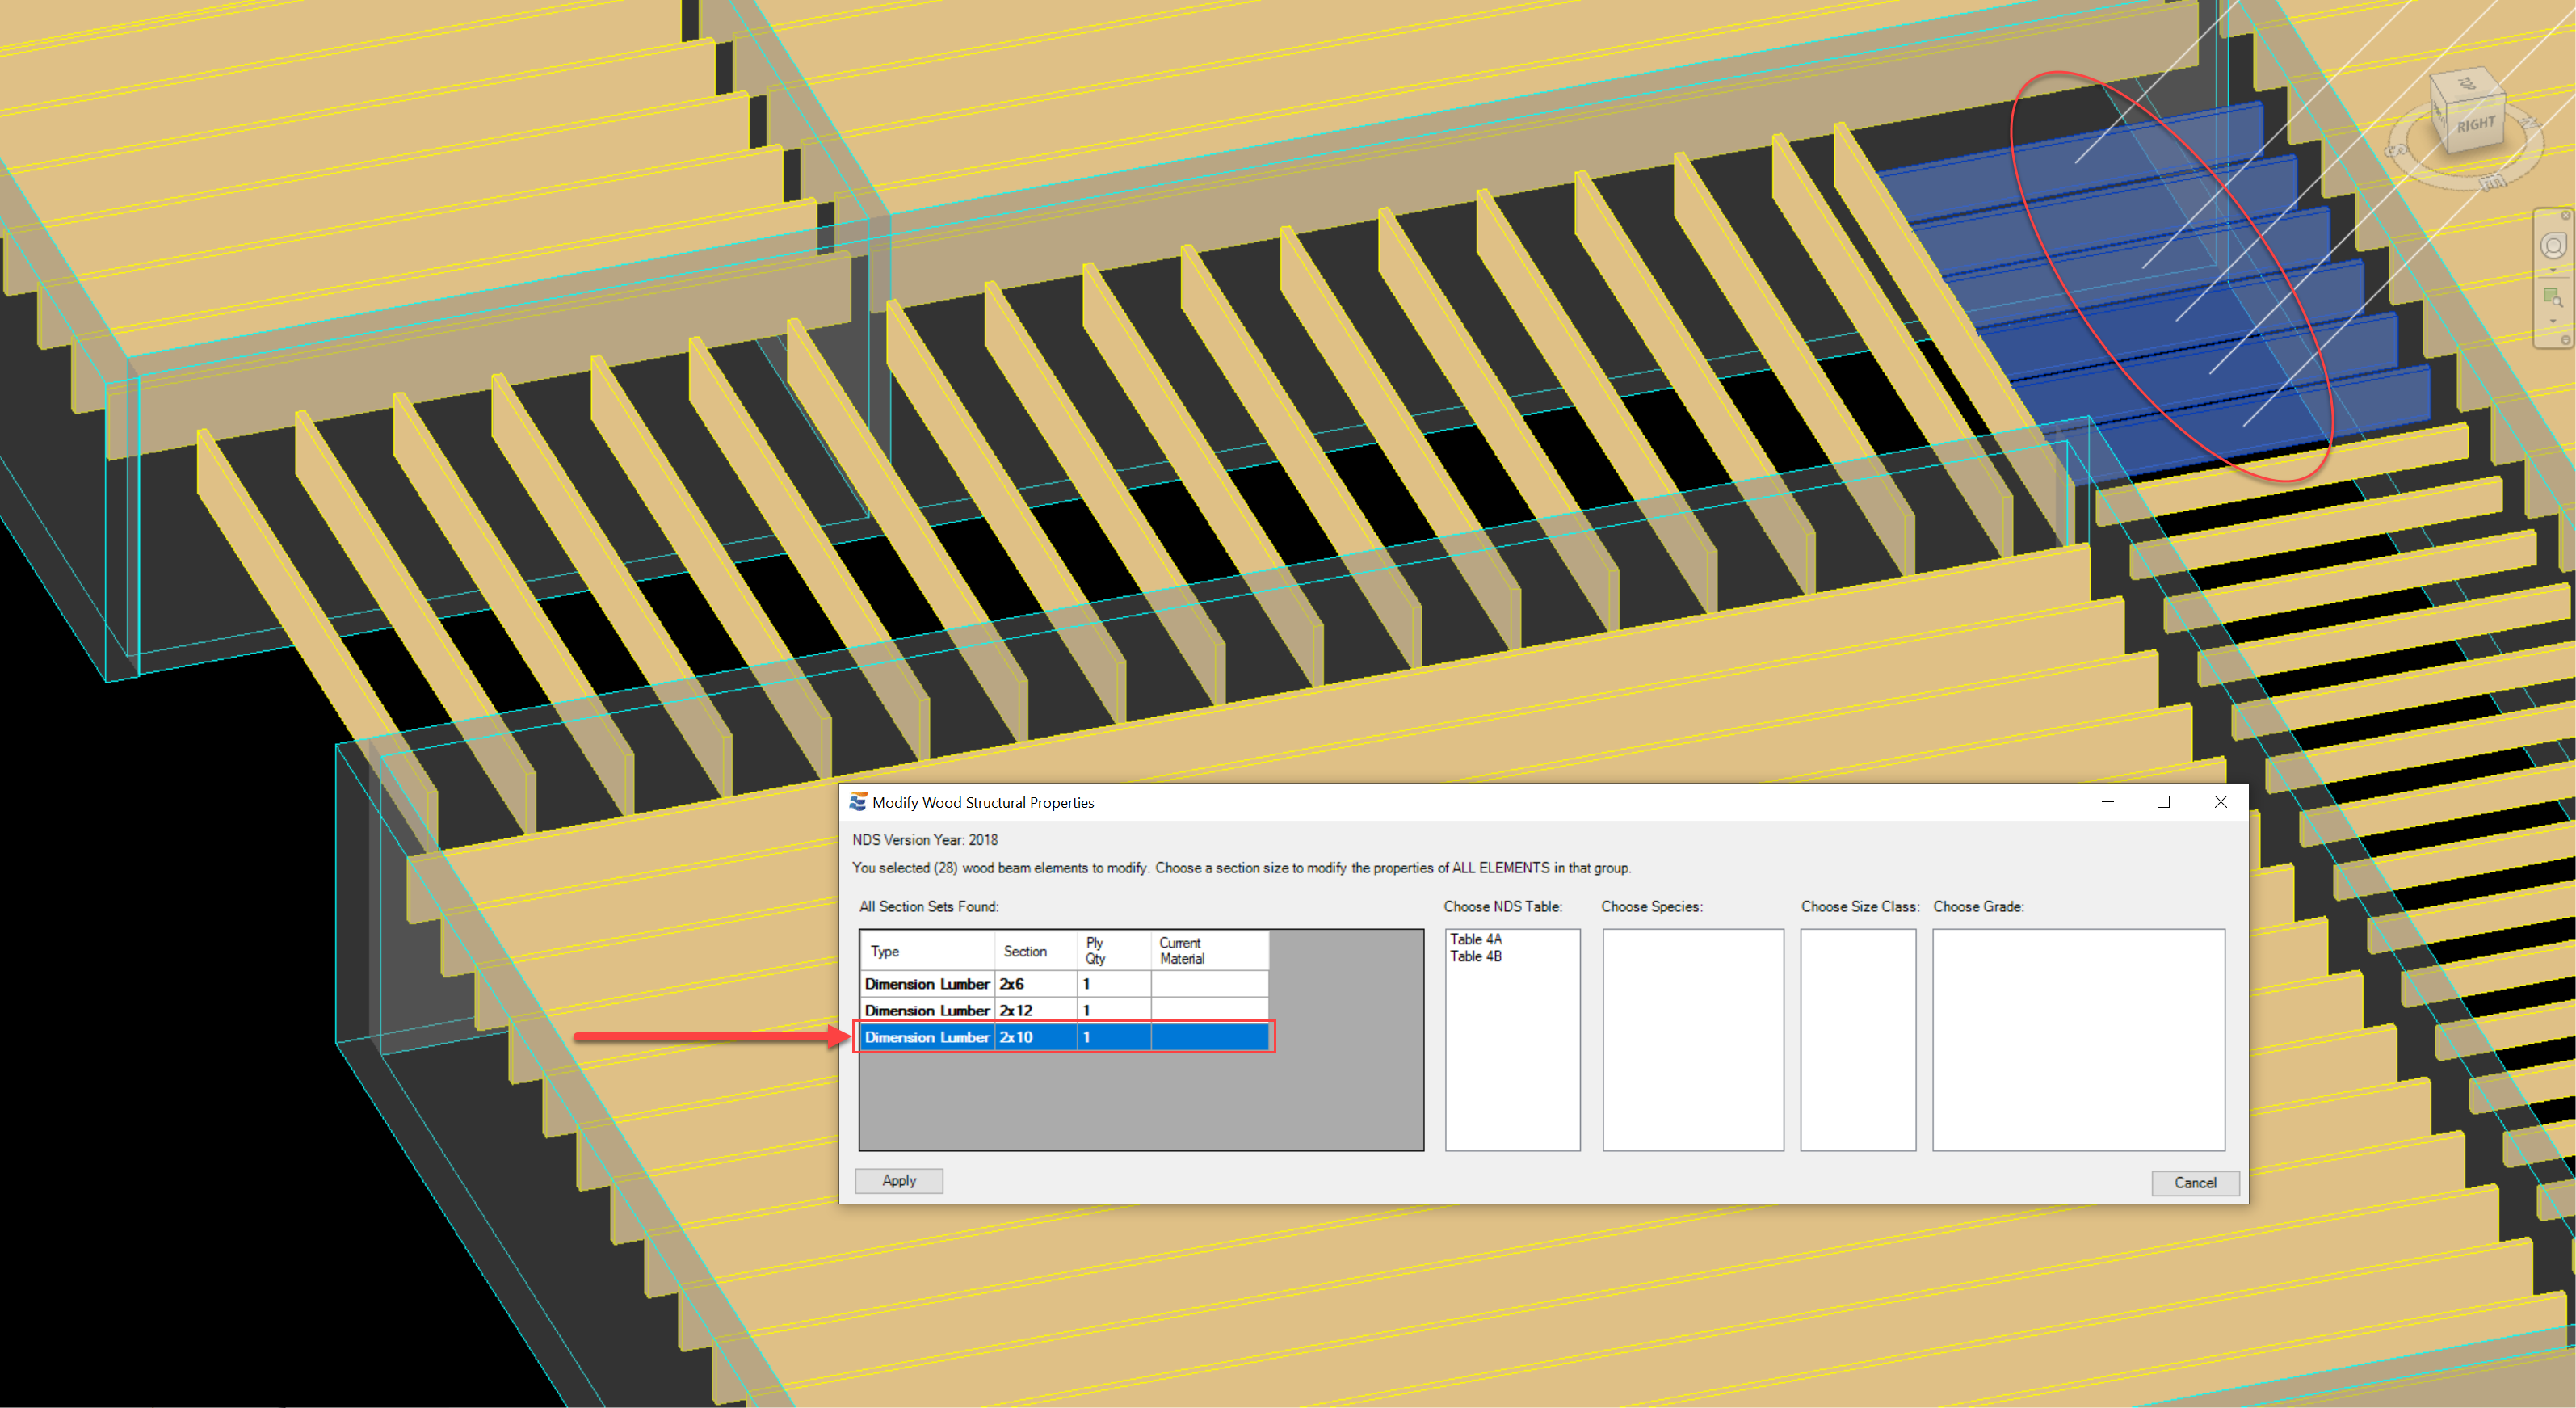
If the bulk selection encompasses elements of differing section size, then the differing sections will be grouped into individual line items in the table:
When the edit window opens, the display table will include a separate line item for each individual section type found:
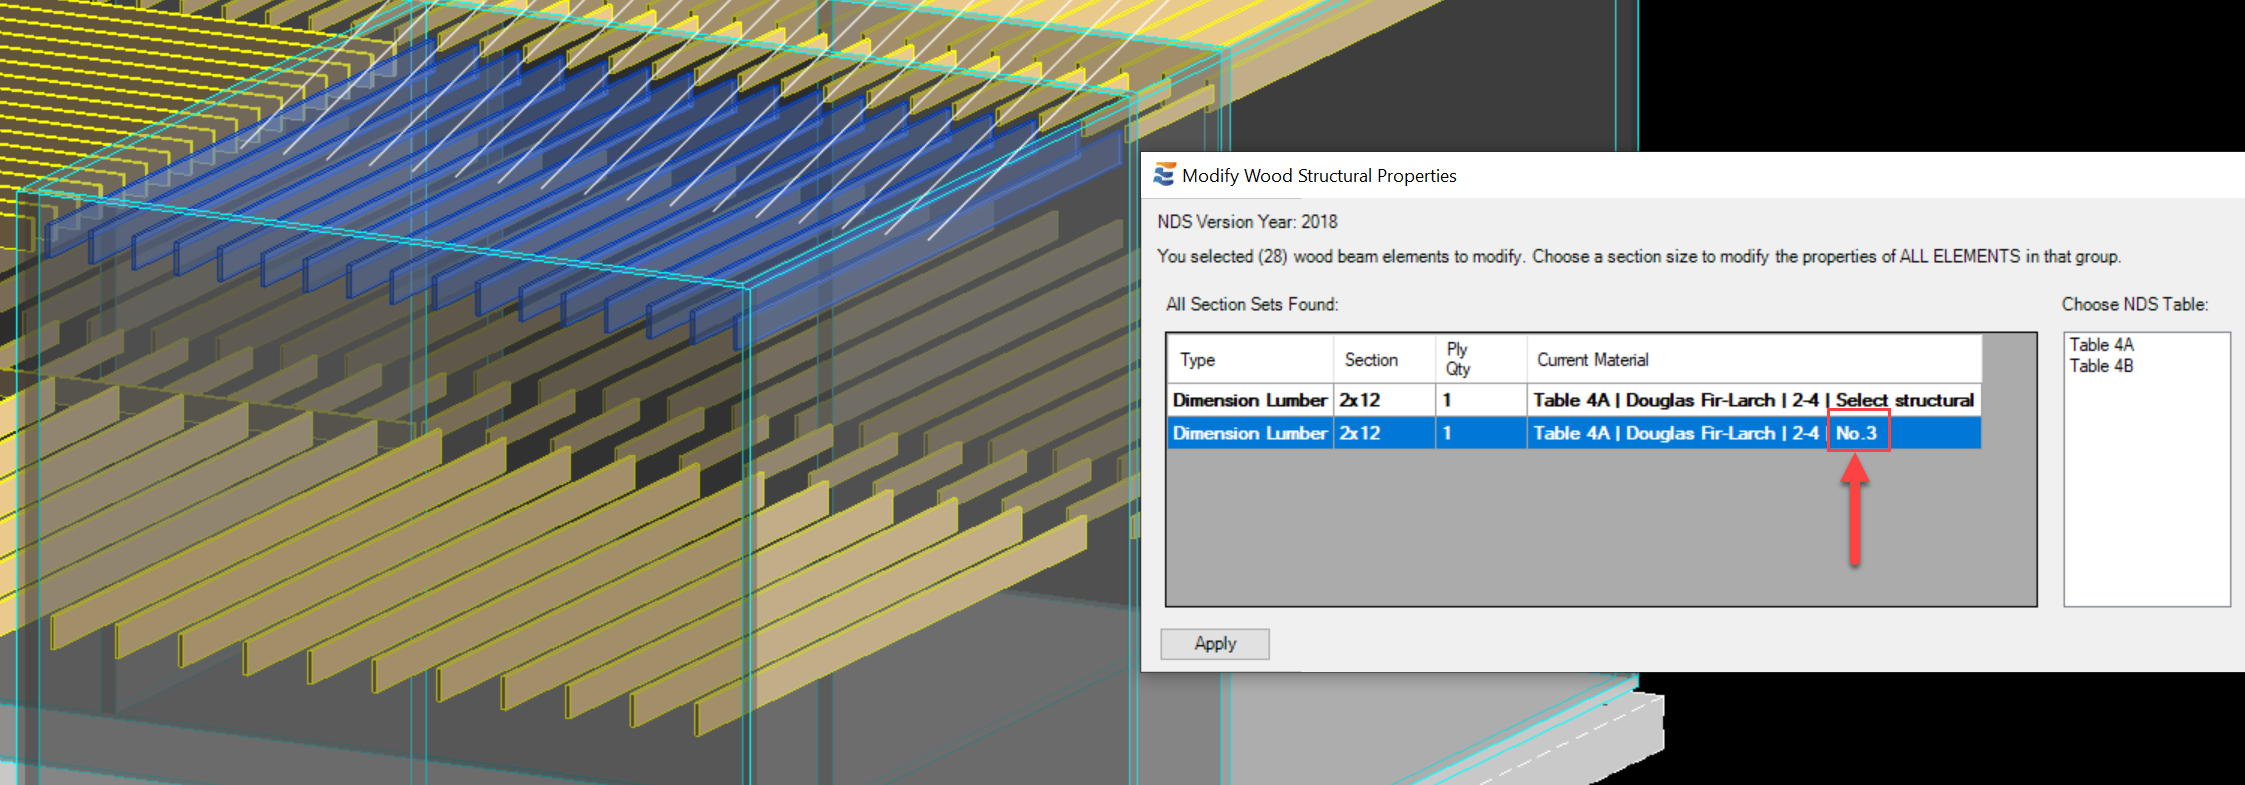
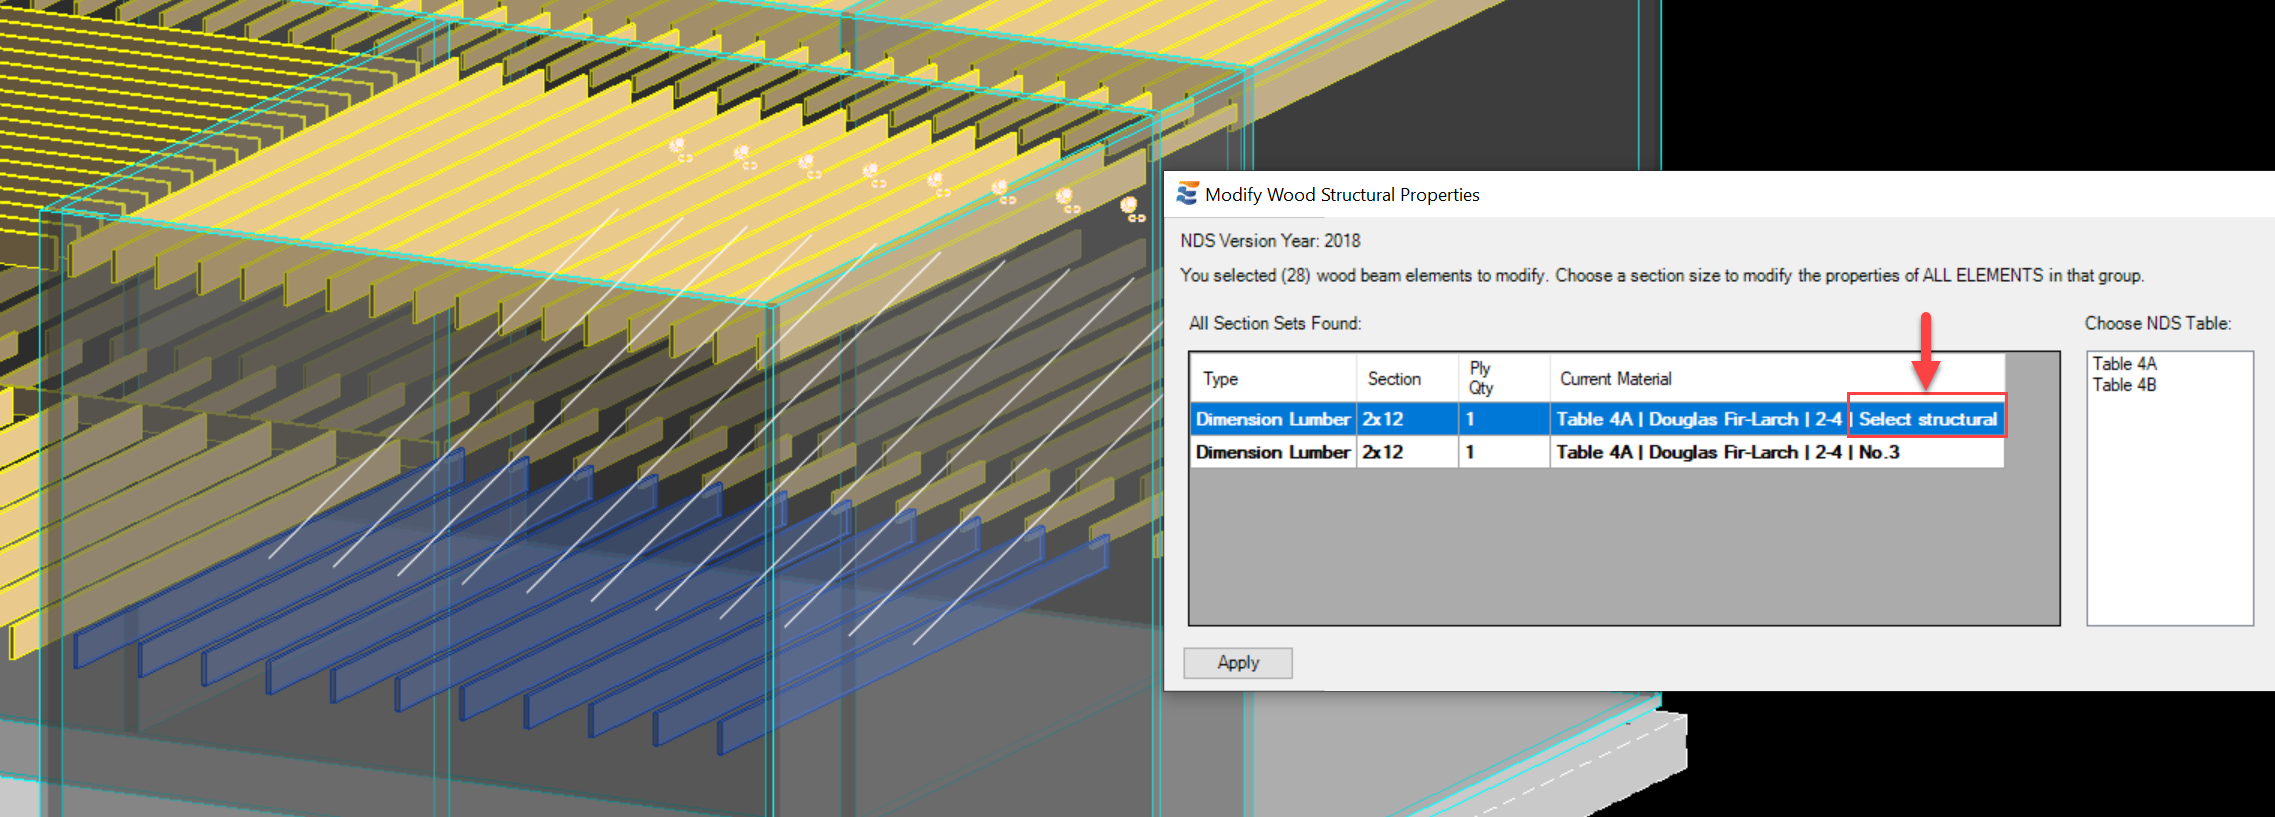
Selecting a line item in the table will automatically select the corresponding beam elements in the active Revit view for visual reference:
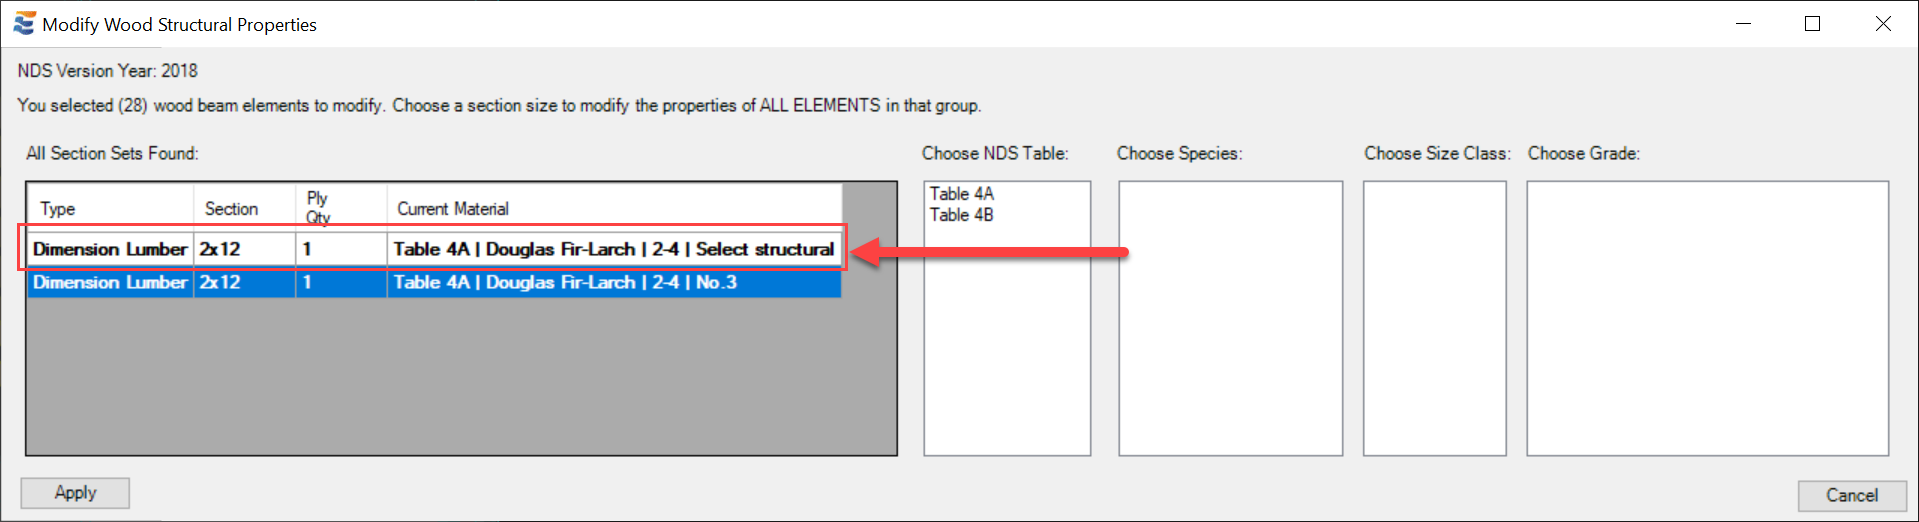
If the selection for launching the edit window contains beams with the same section size but differing design properties, then the groups will be given separate line items in the table:
When a line item in the display table has not yet been modified or had any properties assigned to it, the text will appear in bold font:
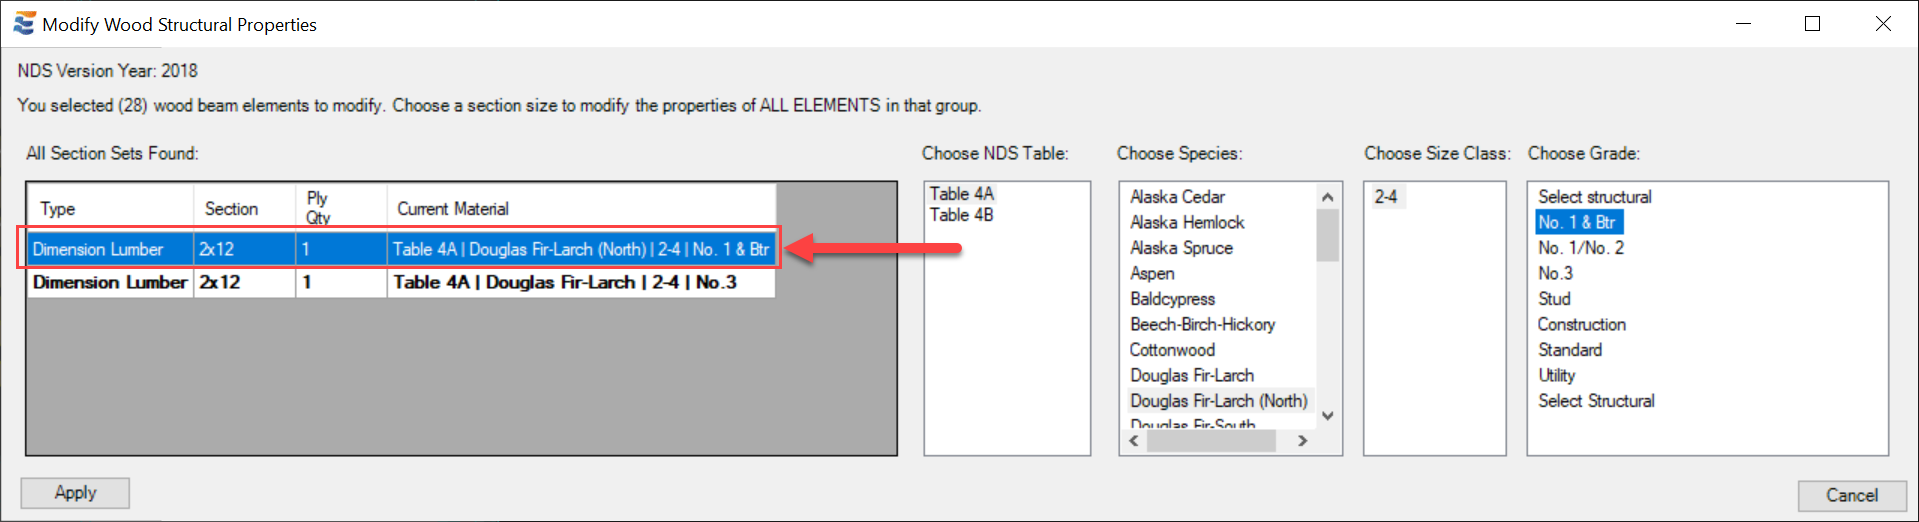
Once a complete set of material properties has been assigned, the bold font will change to standard font:
When multiple section sets are present in the table, clicking the "Apply" button will apply each individual line item's design properties to ALL of the elements associated with that particular line item (i.e., only the beams highlighted when that row is picked). Any line item lacking a complete definition will not be applied.
 <
<