Assigning To Single Element |
  
|
Assigning To Single Element |
|
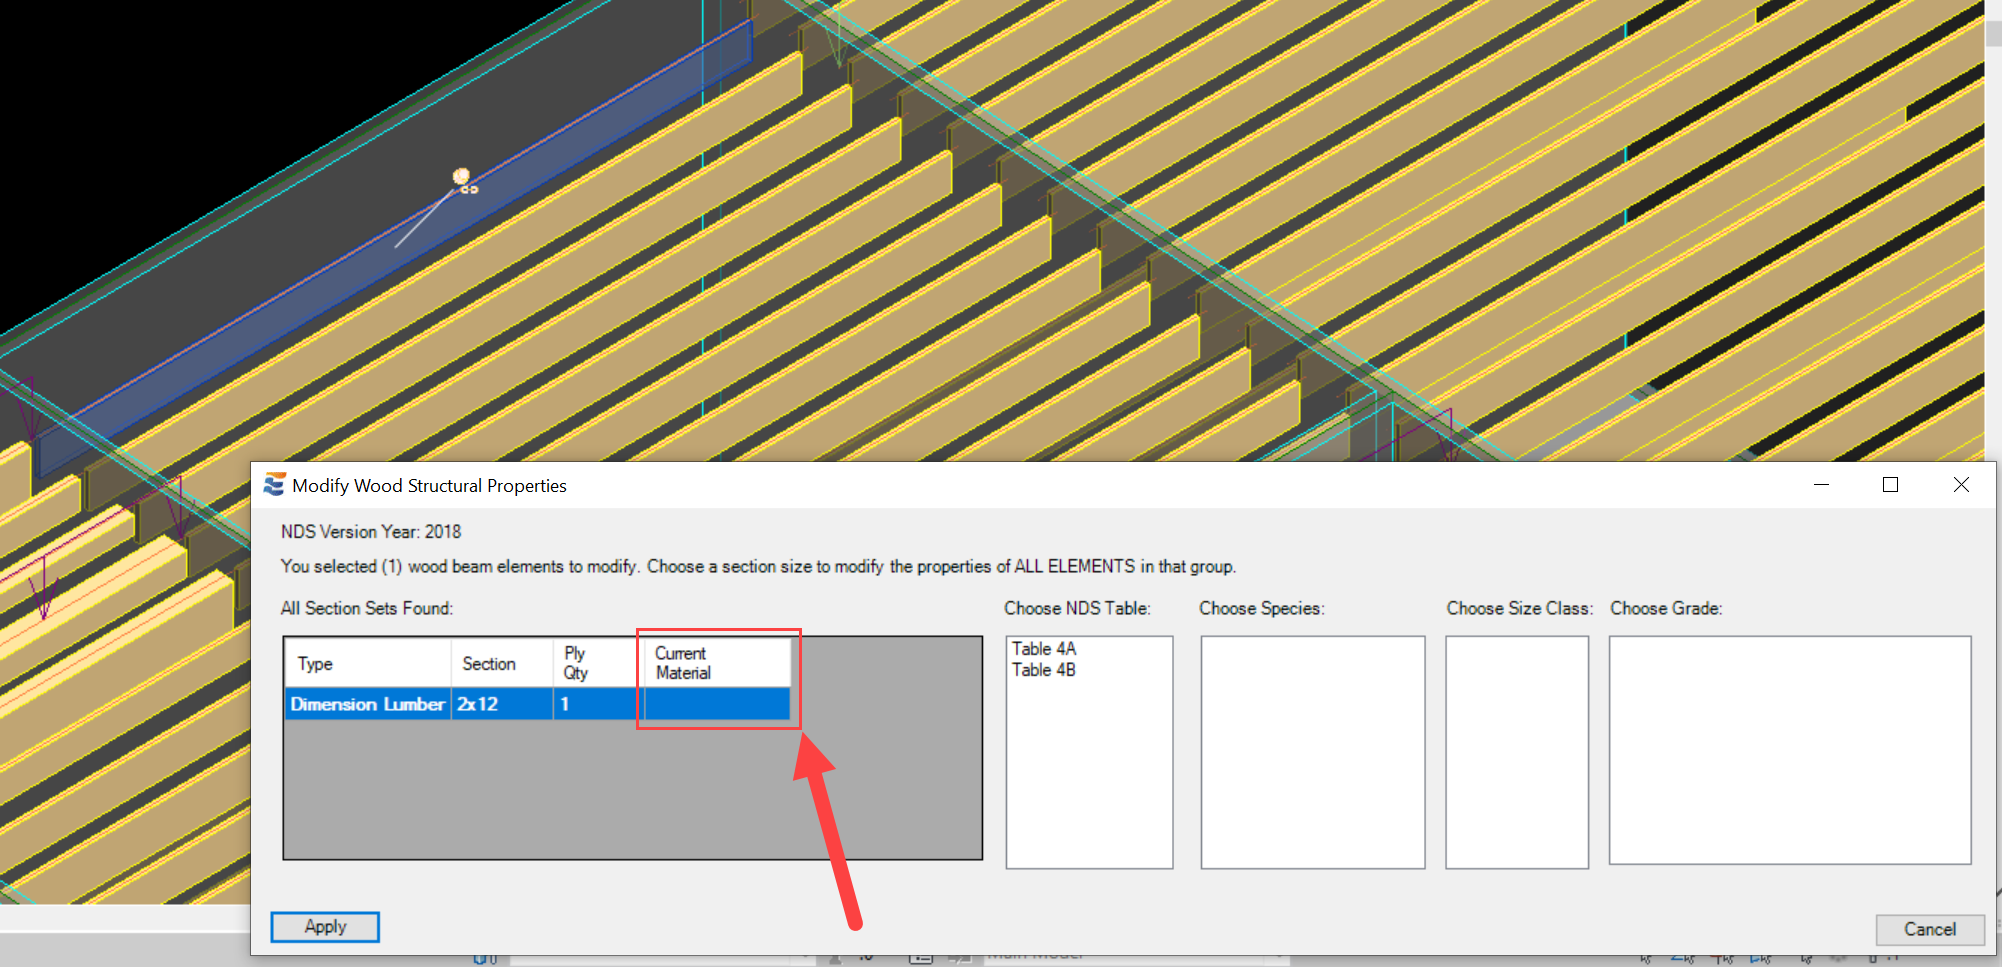
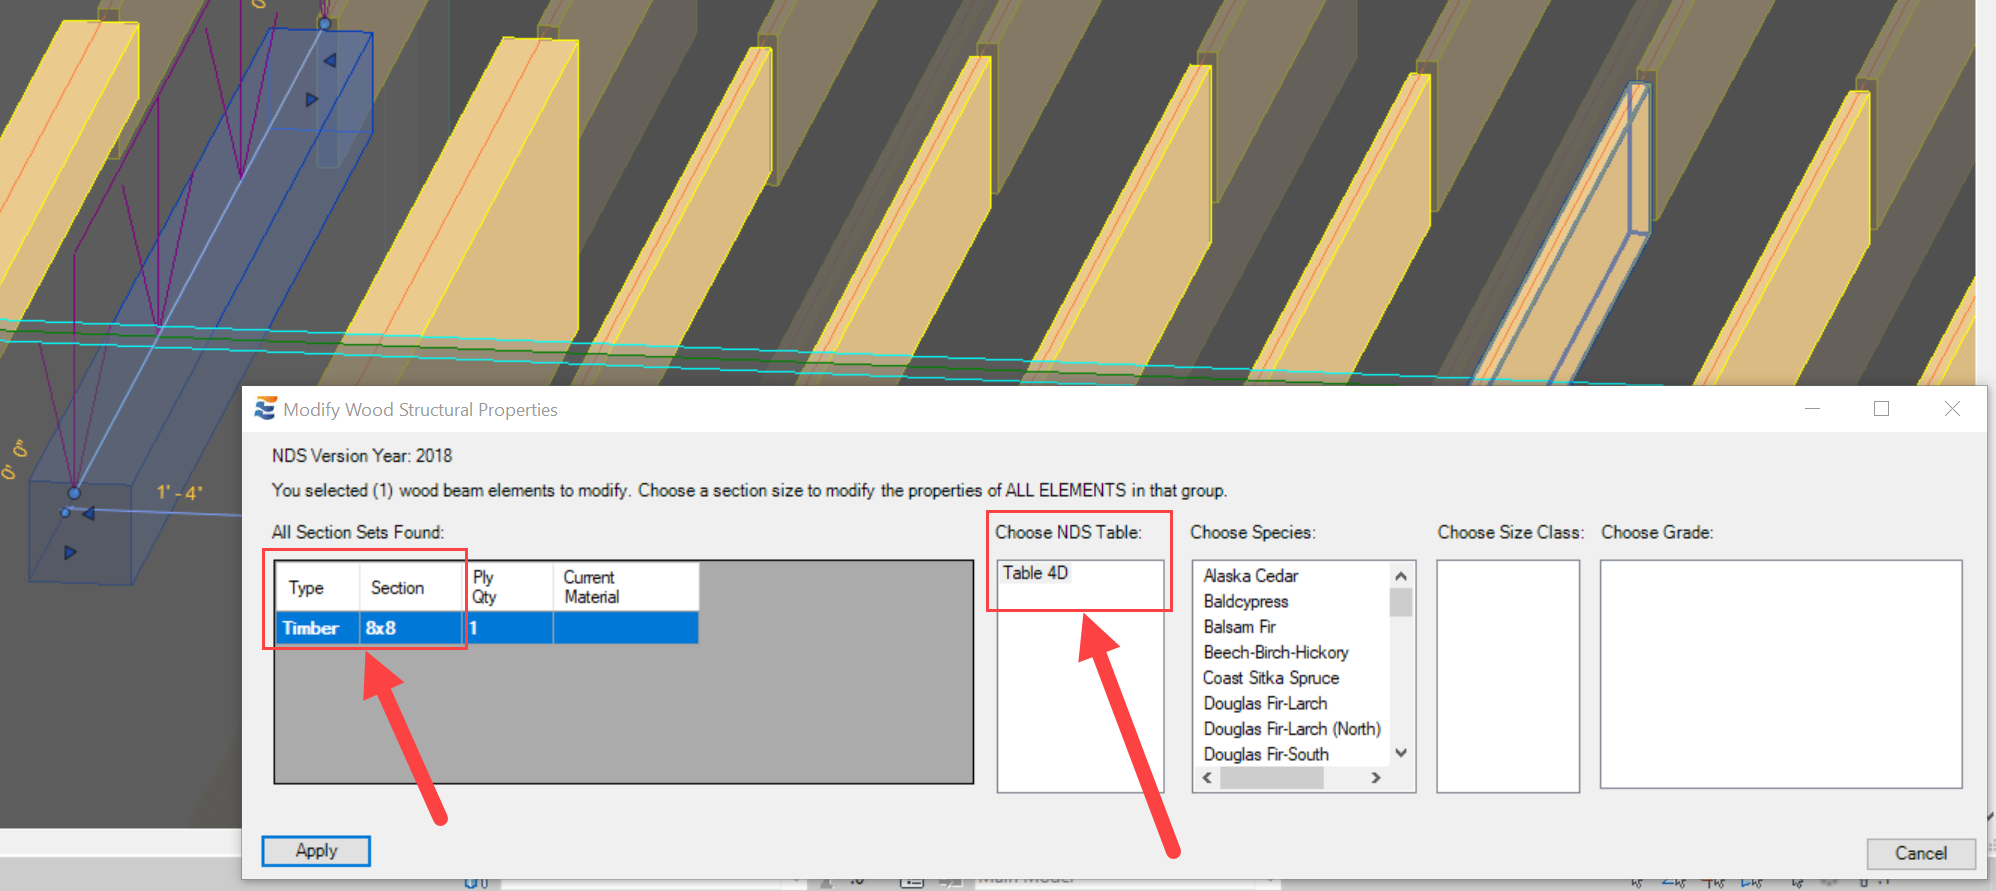
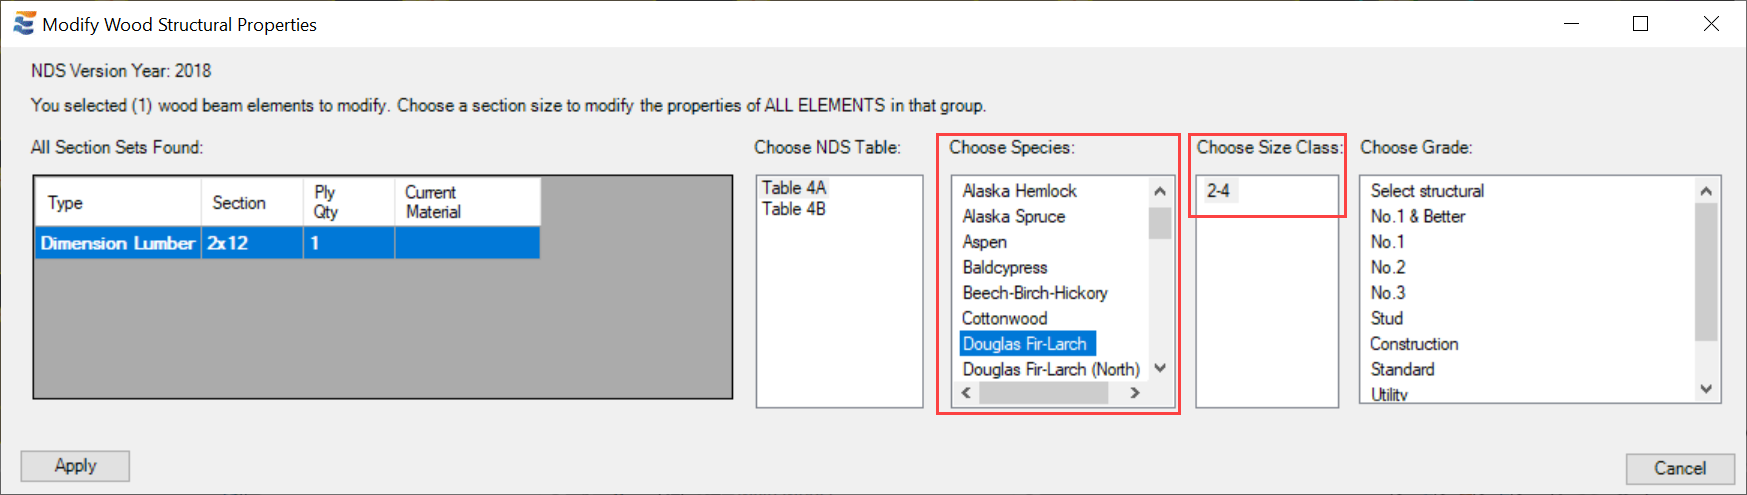
When the user chooses to select only a single element during the "Edit Wood Materials" launch, the menu will populate with one section set. If there are no material properties currently assigned to the element, then the "Current Material" display in the section set table will be blank:
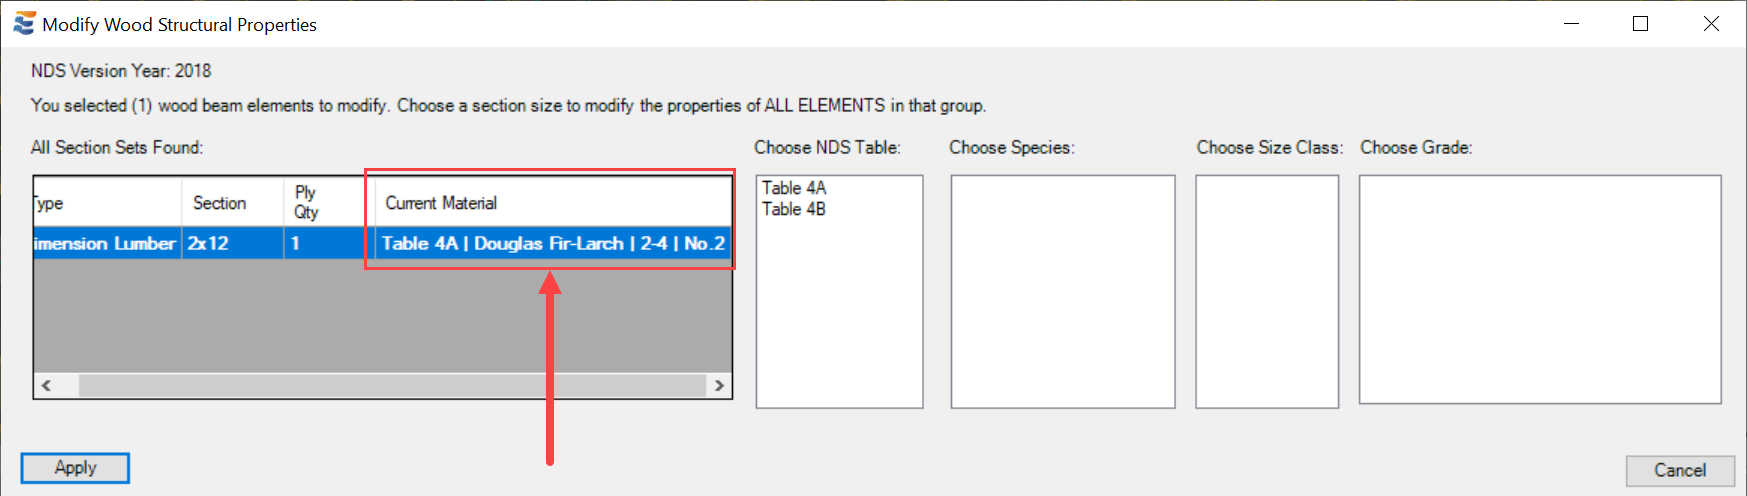
If the selected element already has wood properties assigned to it, then the existing properties will be displayed when the menu loads:
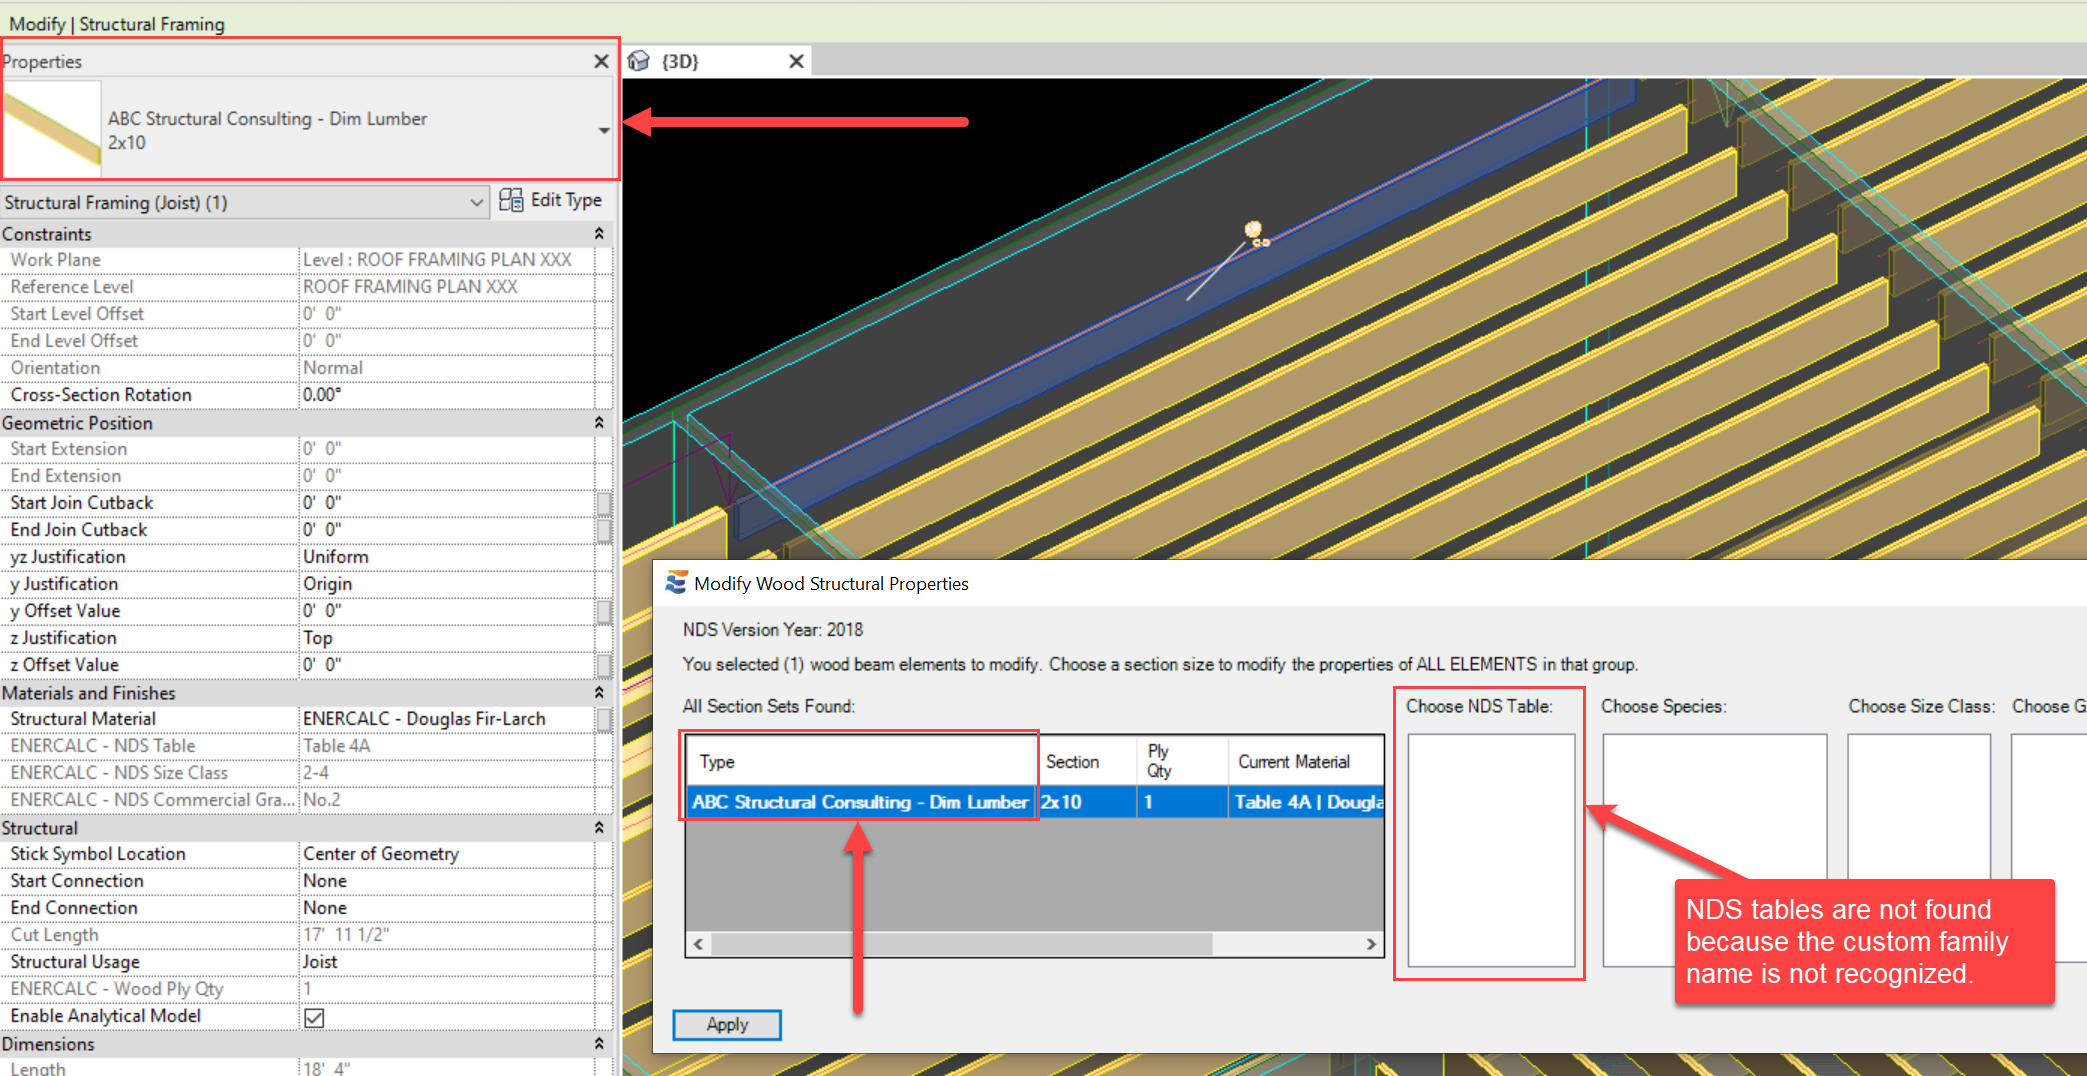
The table also displays the section type and section name. The section type and name displayed in the table are based on the family name and section name of the Revit element. It is advisable to use default Revit families for wood structural framing or ensure that family and section naming is identical to the default naming. Inability to match family and section names to NDS standard types and sections will prevent the material edit menu from functioning properly:
If the family name is recognized, the table automatically displays a list of eligible NDS tables that are compatible with the selected section.
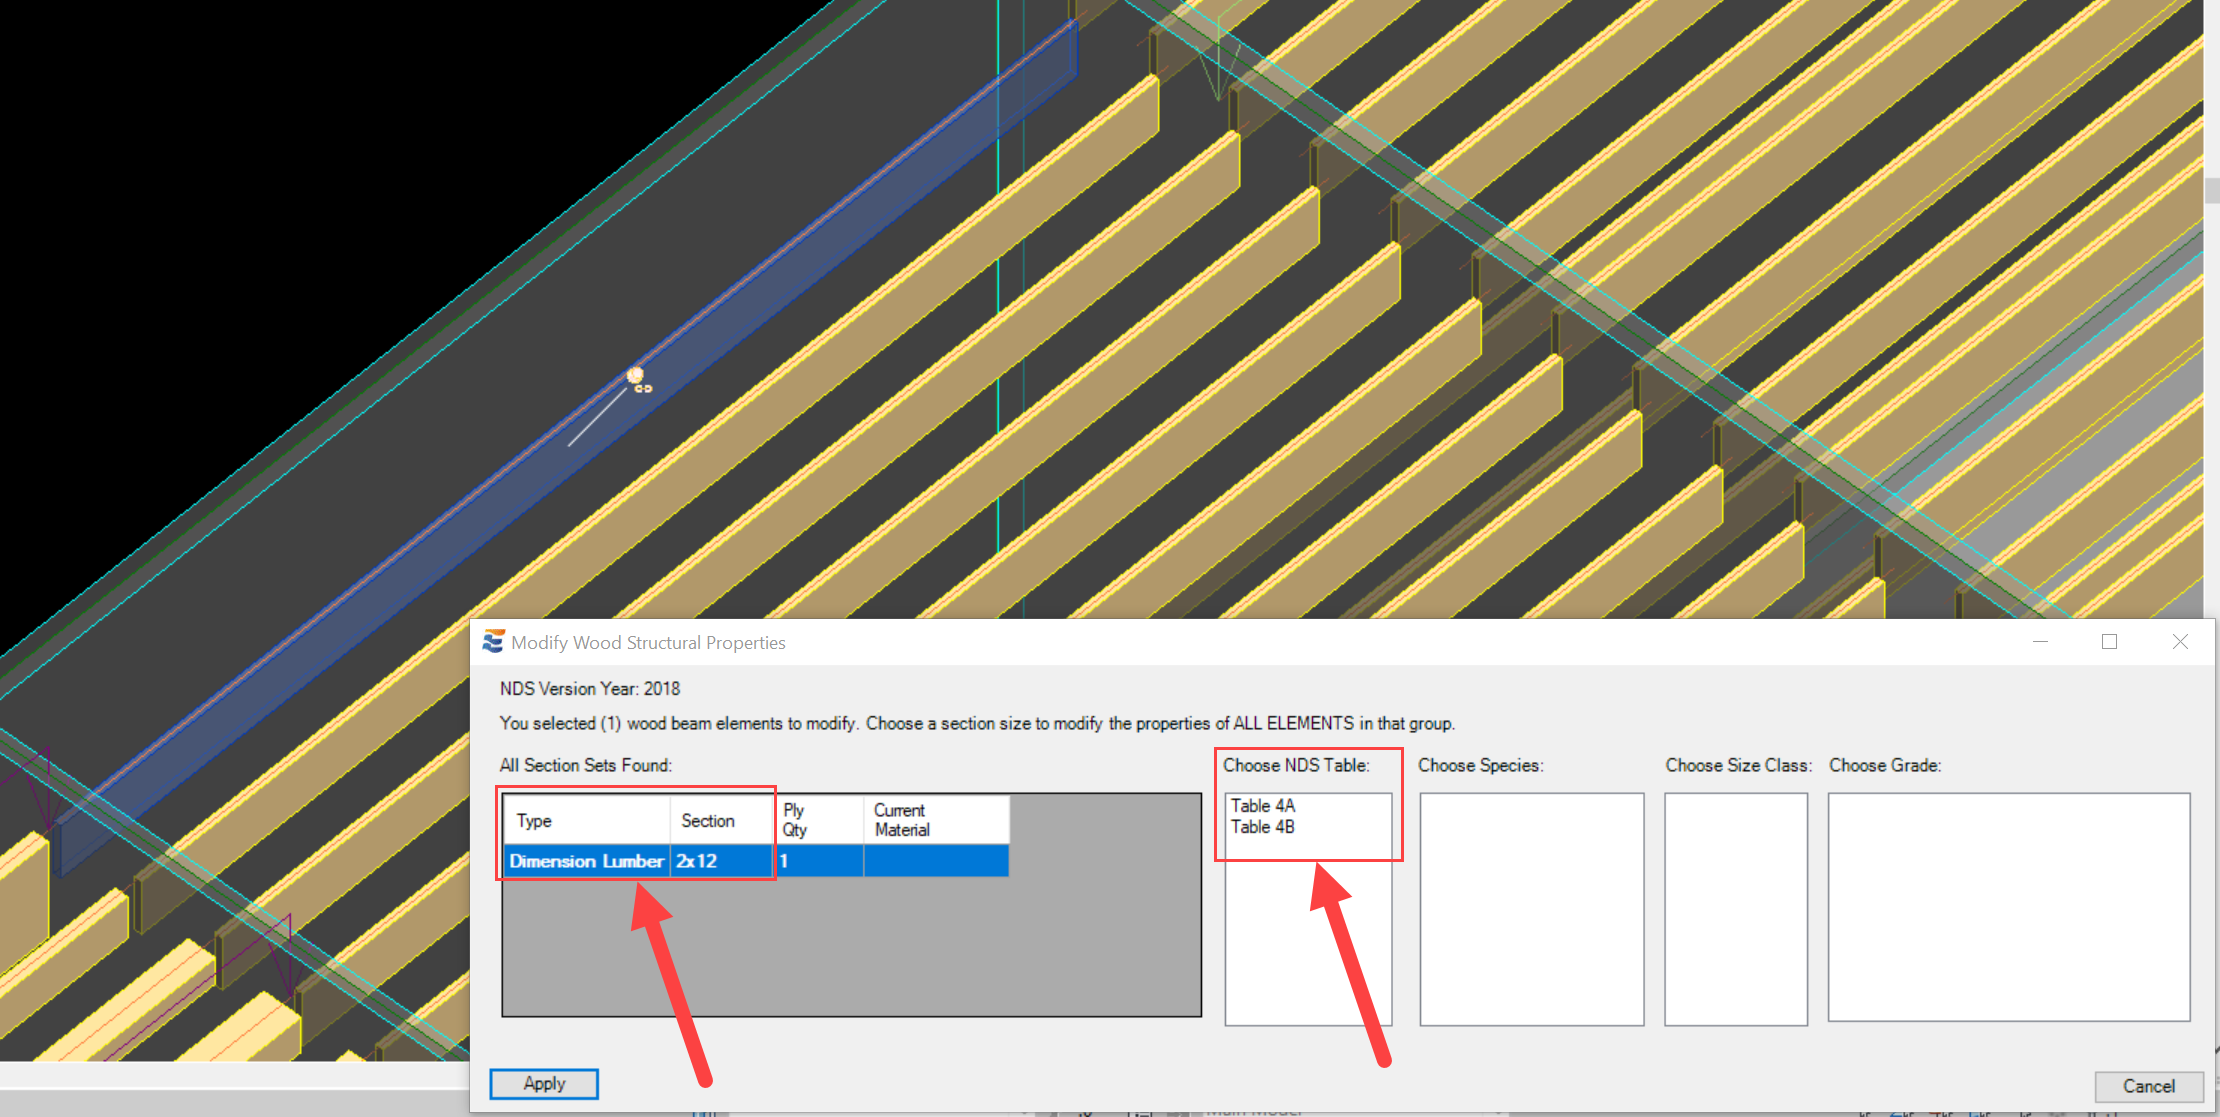

In cases where there is only one eligible NDS table, the only available option will be selected automatically, and the species options found in that NDS table will be displayed:
In cases where more than one table is available, the species table will populate AFTER an NDS table is selected:
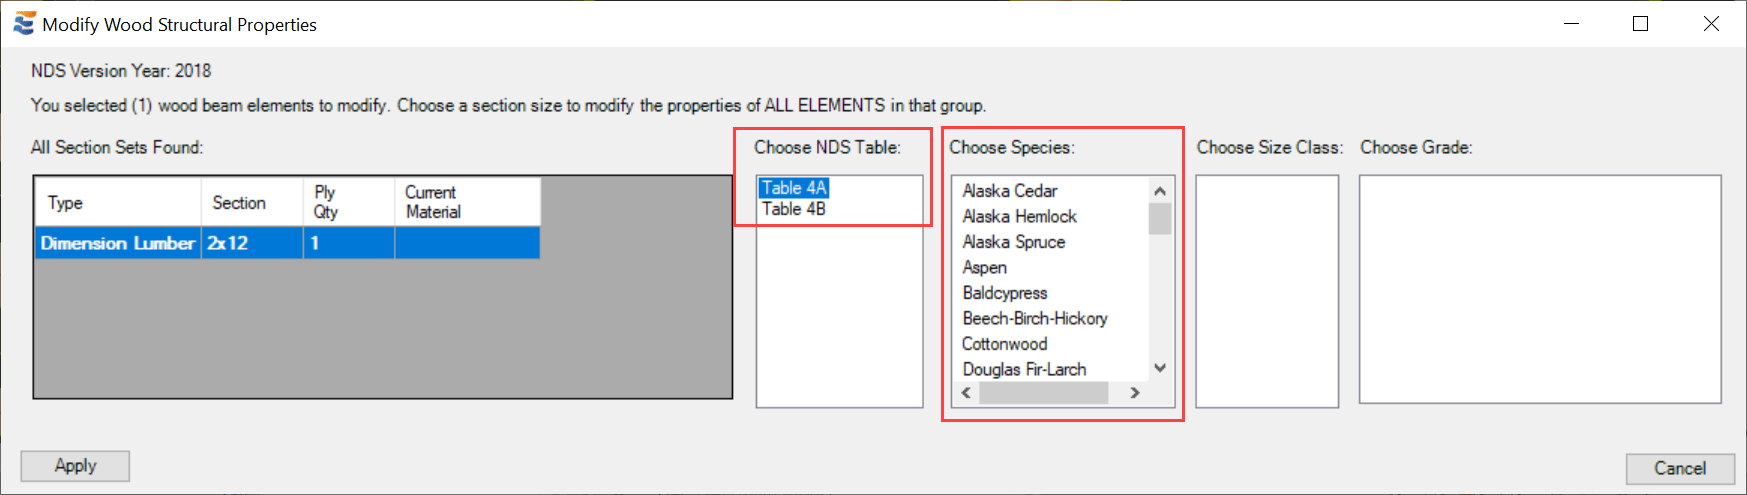
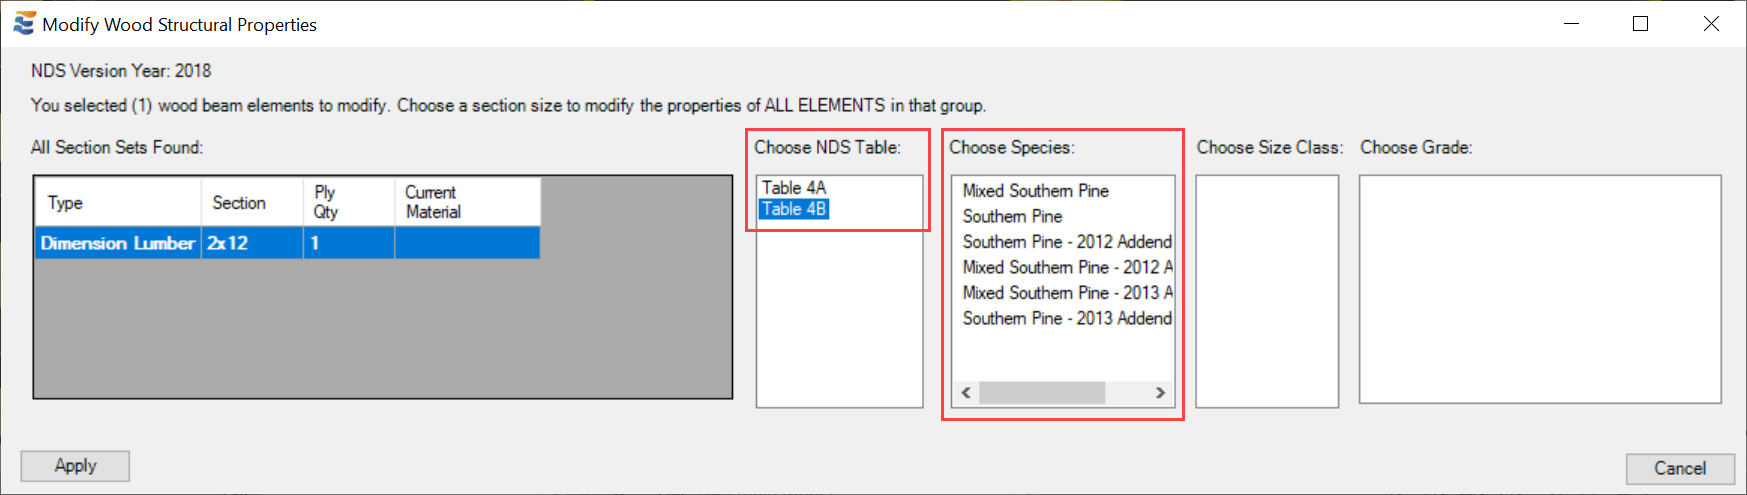
If a different NDS table is selected, the species options will update accordingly:
Once a wood species has been selected, the Size Class table will automatically populate with the associated NDS size classifications:
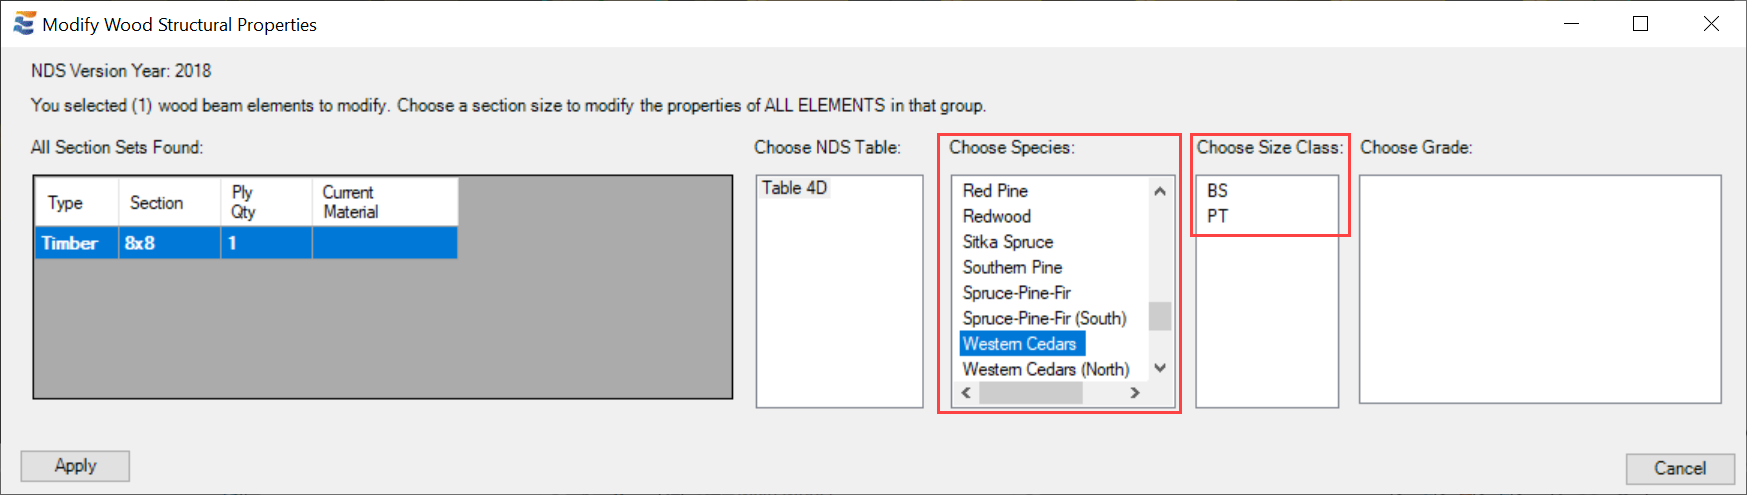
In cases where there is only one eligible NDS size classification, the only available option will be selected automatically, and the commercial grades found in that NDS table will be displayed:
In cases where more than one size classification is available, the grade table will populate AFTER an NDS size class is selected:

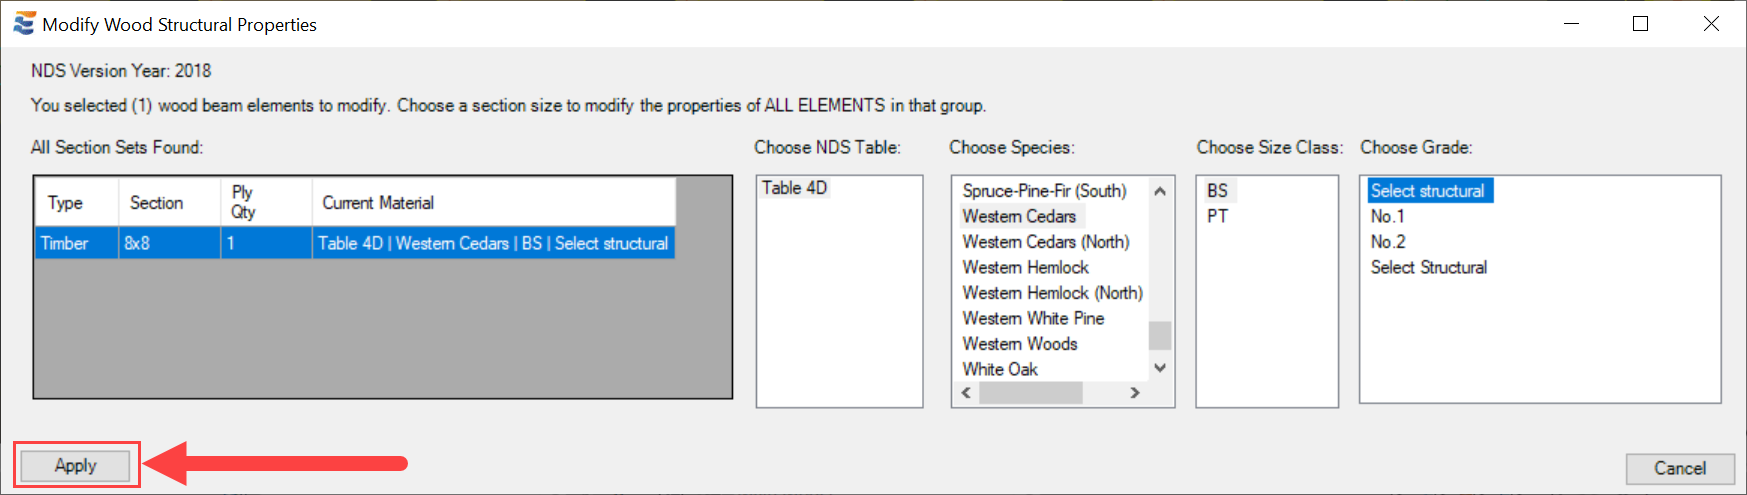
Once a commercial grade option has been selected, the "Current Material" field in the section set table will show a summary of the complete material definition the user has selected:

Where applicable, the user may also choose to modify the "Ply Qty" value to create a design where multiple sections are used together to achieve structural performance. In structural design practice, this is predominately done with dimensional lumber and occasionally with certain engineered sections (i.e., LVLs). The ply quantity may be directly modified using the corresponding cell in the table. For more detail on this topic, refer to Multiple Ply Beams.

Changing the ply quantity does not have any influence over the physically modeled beam instance. It does not change the 2D or 3D graphics of the beam, nor does it alter the total number of actual beams modeled in the Revit project. It is purely a numerical parameter that allows ENERCALC for Revit to communicate the gross section geometry to ENERCALC when building the calculation. If desired, the parameter may also be referenced in schedules or quantity take-offs, since it is a Revit "Shared Parameter". For further reading on this topic, refer to "Wood Beam Tagging". (ed note: link removed temporarily). Users should also be aware that modifying the ply quantity on a section type for which ENERCALC does not support multi-ply configurations (i.e., glulam beams) will result in an error when attempting to launch the calculation.
Alternatively, a design team may choose to use custom beam sections which represent accurate geometry and graphical appearance of a multiple-ply beam. In such cases, the multiple-ply beam sections should be named using the exact convention as that used in ENERCALC in order to ensure interoperability.
Once the definition is complete, clicking the "Apply" button will apply the chosen material properties to the Revit beam element. Clicking "Apply" when the definition is incomplete will have no effect on the element.
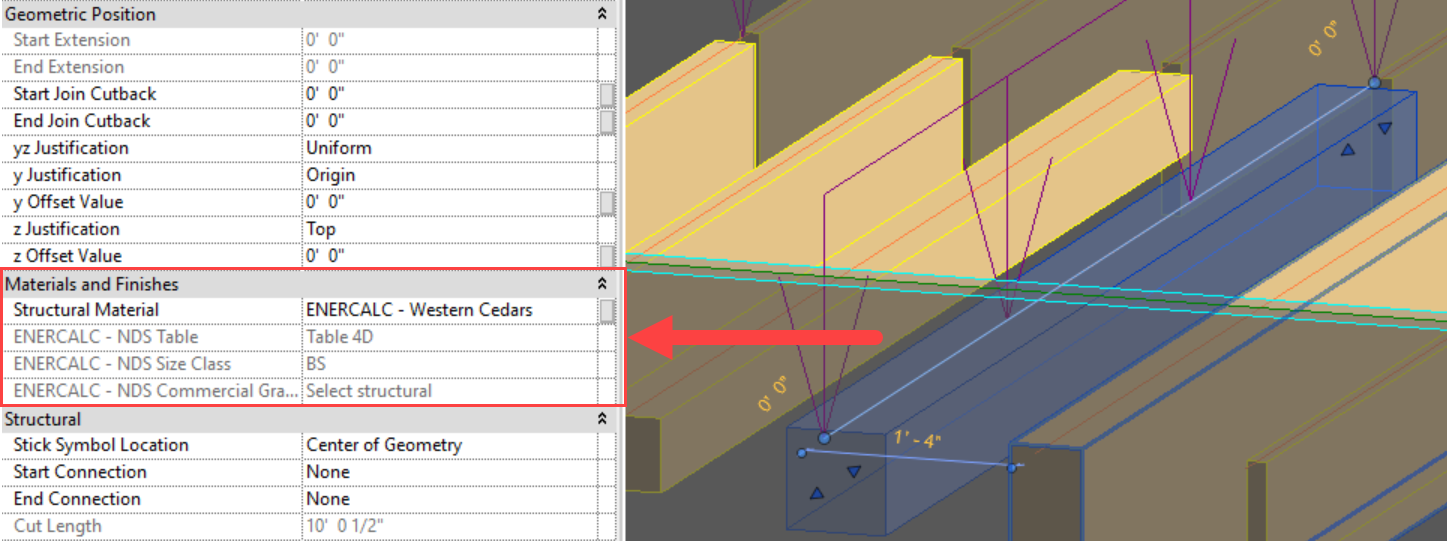
After the "Apply" button is clicked, the window will close and the material properties will be visible in the Revit "Properties" pane for the beam:
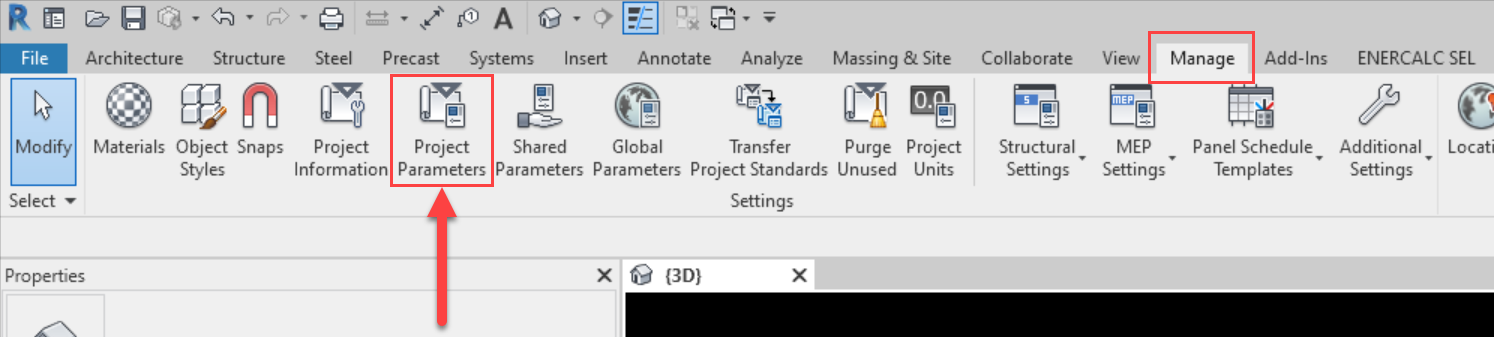
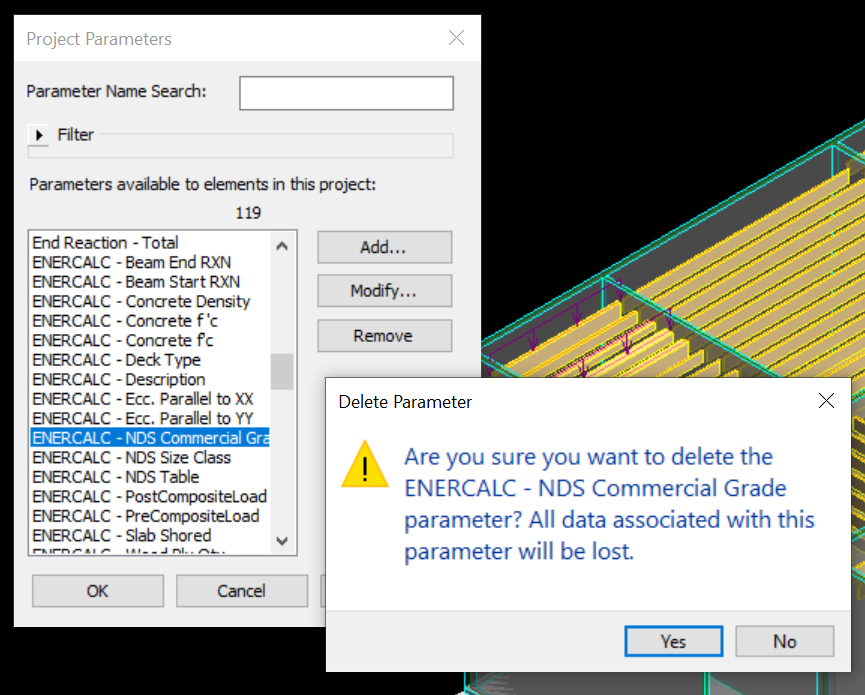
Users should also take note that since wood material property information is stored using Revit's native "Shared Parameter" framework, the parameters are exposed to view and possible removal by any team member. Removal of the underlying parameter that stores this information will result in loss of design data and will render ENERCALC for Revit unable to launch Wood Beam calculations in the project. Revit's native management tools for parameters include a warning on this topic:
In the event that these parameters are removed from a project, the parameters themselves will be re-generated automatically by ENERCALC for Revit the next time the .rvt file is opened. Any material properties formerly stored in the parameters will need to be manually repopulated using the "Edit Wood Material" menu.
 <
<