Manually Selecting Tributary Beams |
  
|
Manually Selecting Tributary Beams |
|
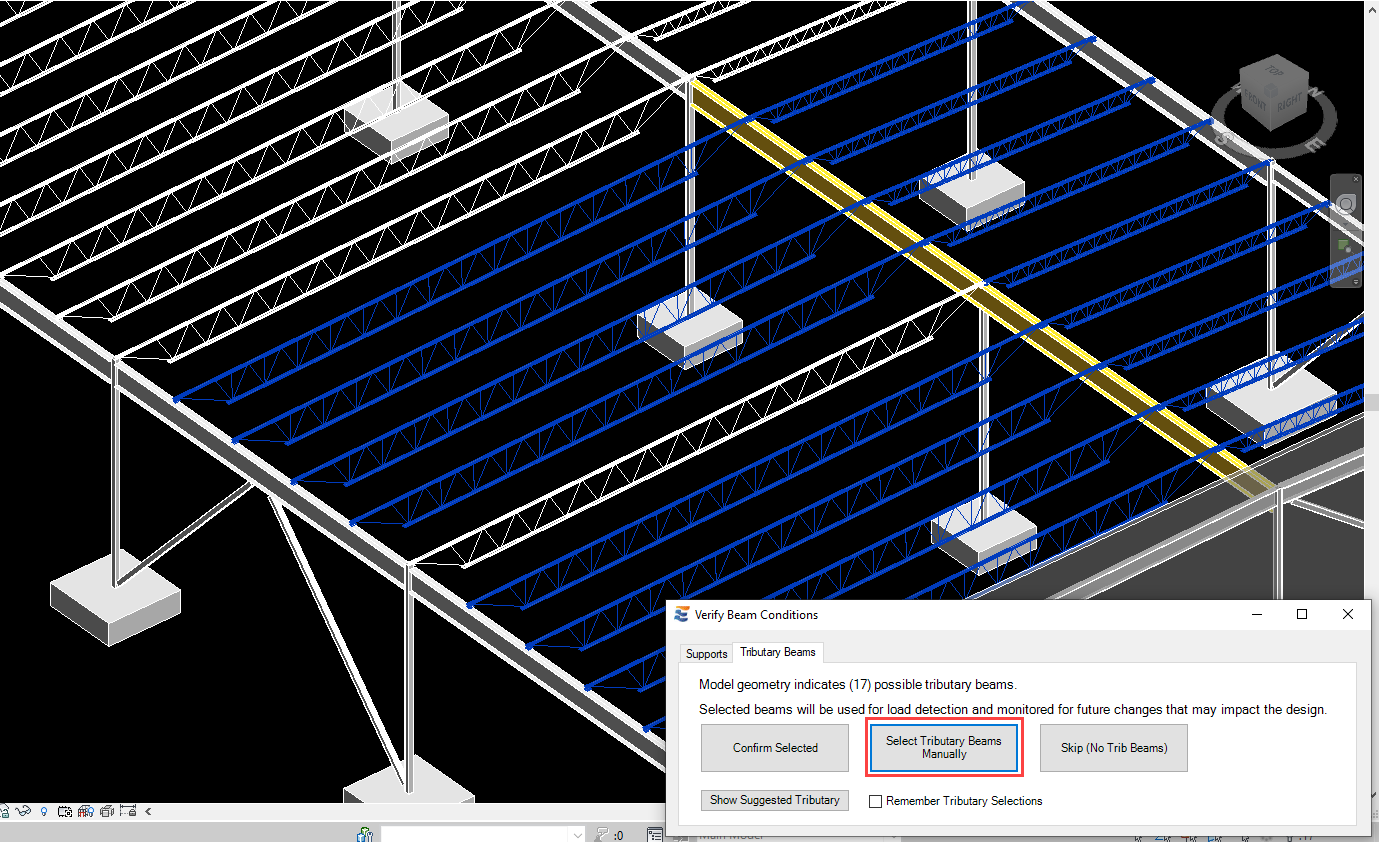
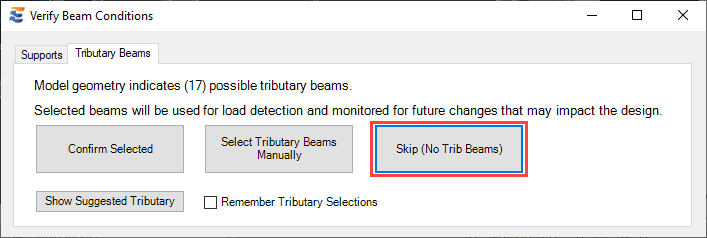
In situations where the suggested tributary beams do not accurately describe the design intent, a user may alternatively choose to manually specify the tributary elements. Custom selection of tributary beams is triggered by clicking the “Select Tributary Beams Manually” button.
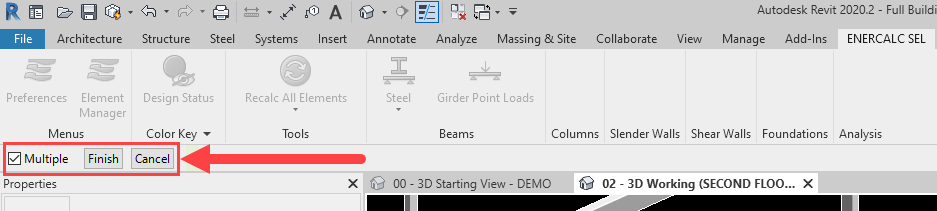
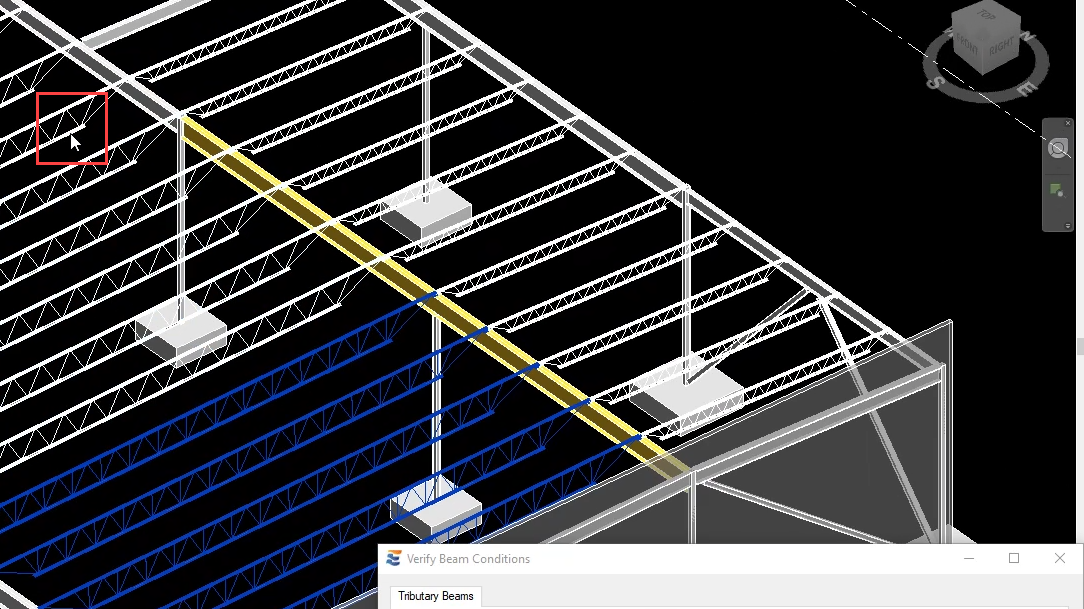
Clicking this button will initiate a Revit multi-select process similar to that used for other native Revit operations. When the multi-select is active, the Revit ribbon bar will display “Finish” and “Cancel” buttons on the upper left-hand corner of the main Revit window and the user will have the ability to manually pick elements.
During the selection process, elements already picked will remain selected (and highlighted) in the active view. Items eligible for selection will light up with a “+” symbol when the cursor passes over.
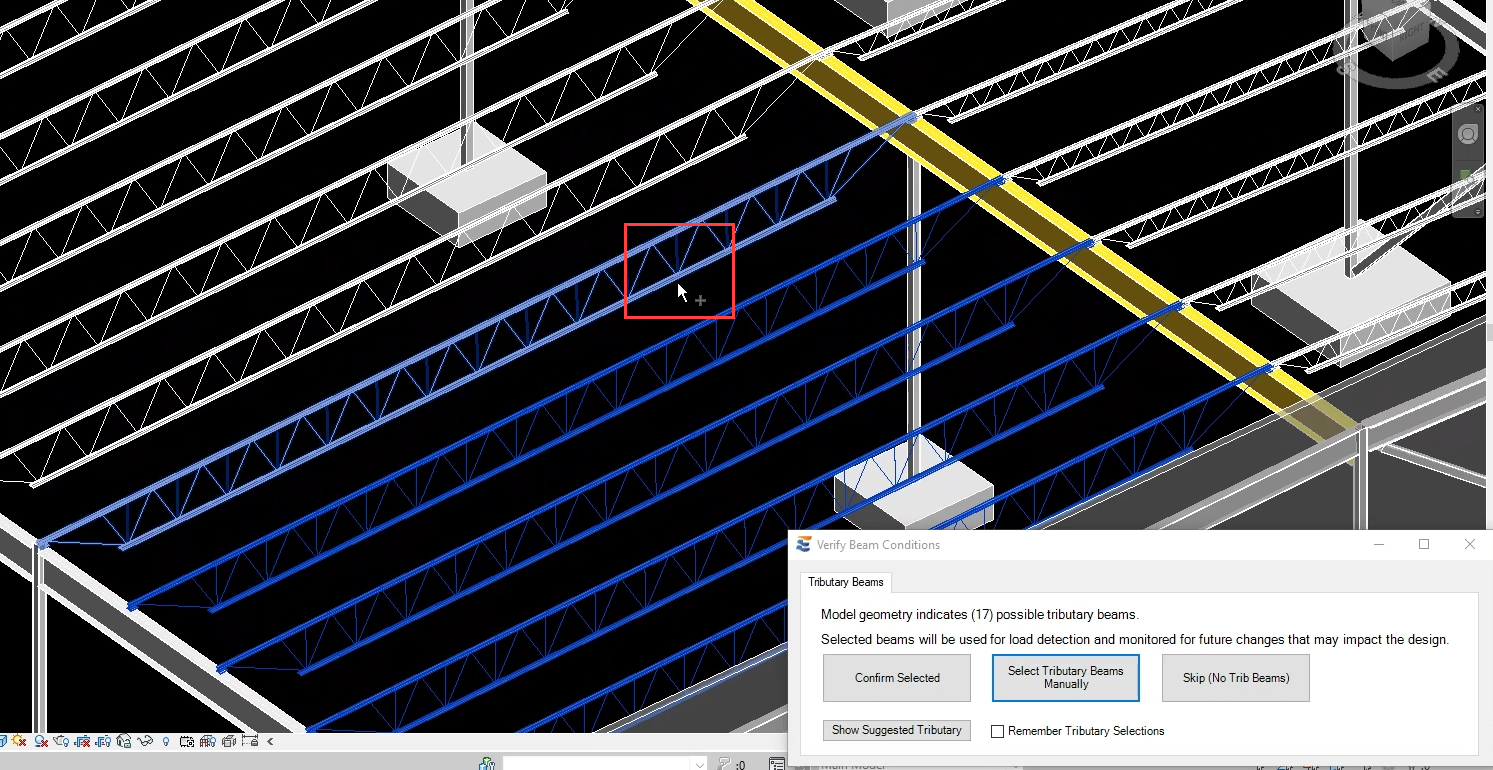
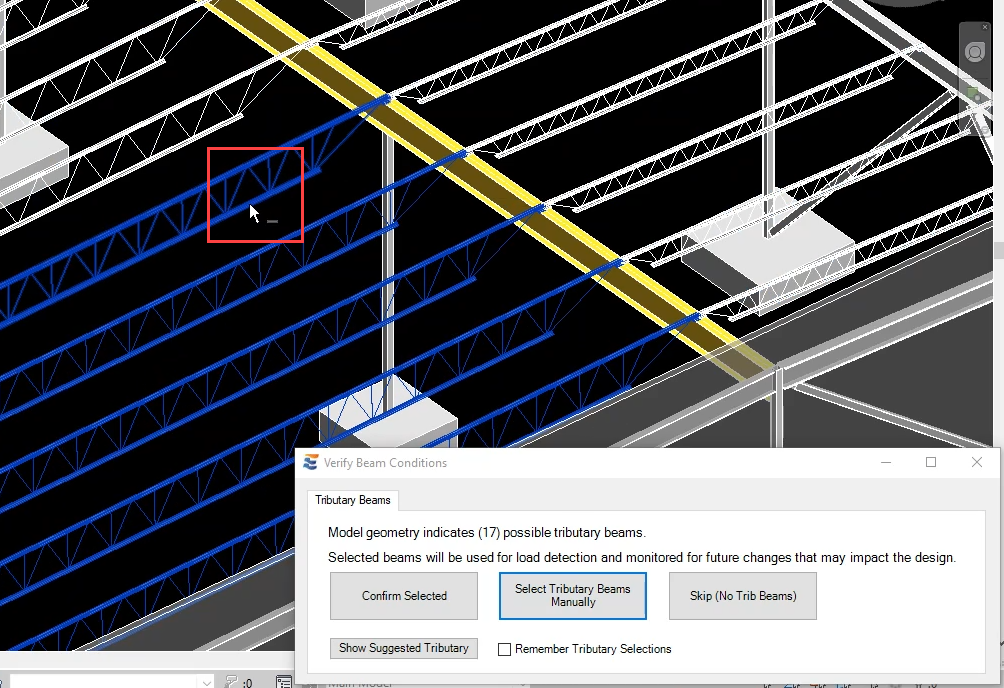
Similarly, an already-selected element eligible for deselection will light up with a “-“ symbol when the cursor passes over.
The tributary beam selection process is also subject to several restrictions. In order to limit downstream errors from difficulty in defining linked reaction locations, the user is restricted to only selecting elements that are in actual proximity to the beam. Elements outside the immediate vicinity of the beam will not be clickable. The user is also restricted to only selecting element types that are eligible to act as tributary elements. When the user points to an element that is not eligible to act as a tributary for the current beam, the element will not highlight and the cursor will not show the “+” symbol.
In some cases, the user may choose to manually select a tributary beam that is near enough to the designed beam to be eligible for selection but does not physically intersect. When this happens, the user will be presented with a warning and three options to resolve the issue.
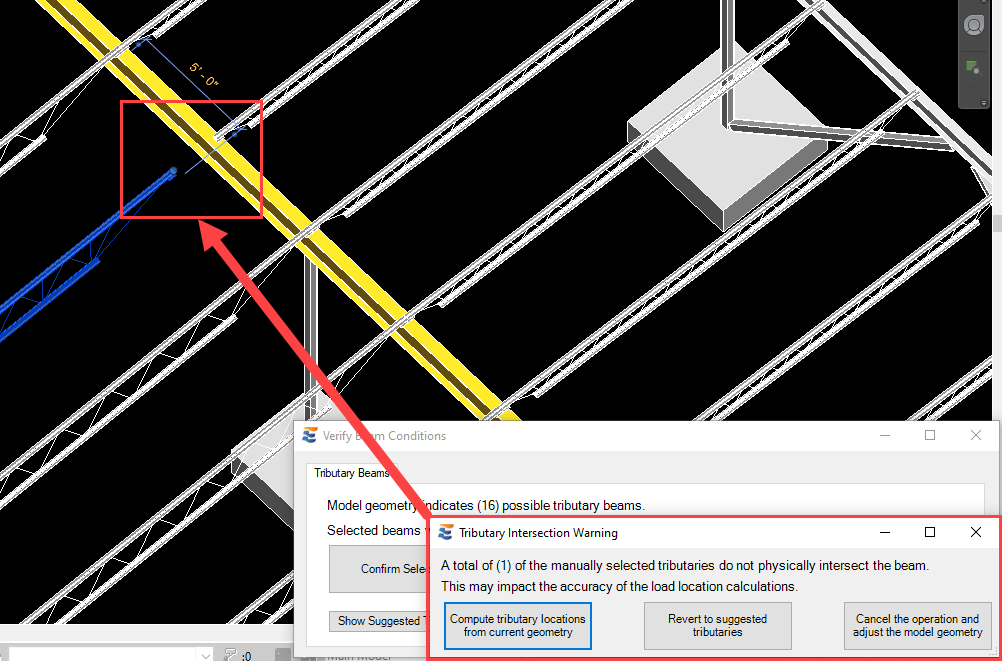
Clicking the left-most button will cause the program to proceed with the launch process using the specified tributary. Applicable linked load locations will be computed from the nearest extrapolated intersection of the two elements. For some geometry cases (such as the one shown above), this option is appropriate and will result in accurate beam analysis. In some cases, however, the lack of physical intersection could indicate the lack of any meaningful relationship by which load linking may be established. If choosing this option results in a downstream warning when span geometry cannot be calculated (or if the calculation in ENERCALC SEL shows inaccurate geometry) then it is advisable to adjust the Revit model for a more accurate tributary condition.
Clicking the middle button will cause the program to proceed with the suggested tributaries rather than the manually specified ones. Suggested tributaries will typically be in direct contact with the beam to be designed, meaning that extrapolation of nearest intersection points is not required.
Clicking the right-most button with cause the launch approval form to close and the yellow highlighting on the beam will be removed. In the case of an aborted launch, no calculation will be created in the linked .EC6 file.
If at any point during the multi-select process the user clicks the “Cancel” button on the Revit ribbon bar, the calculation launch process will proceed. Cancelling out of a multi-select operation has the same effect as using the “Skip (No Trib Beams)” button. In either case, the calculation loaded into SEL will not include force effects associated with any tributary beams.
 <
<