WORD Document |
  
|
WORD Document |
|
Click here for a video:
Adding a Microsoft Word document to the Project requires that you already have Word loaded on your computer.
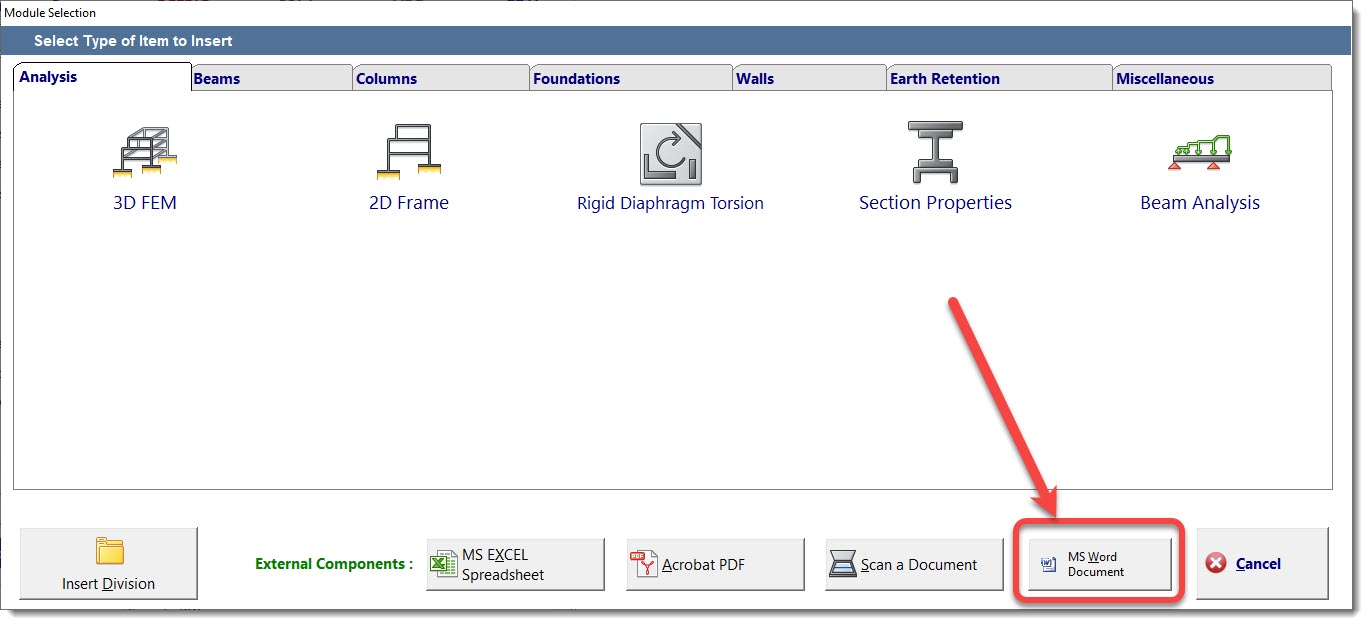
To add a Word document to your Project, click on the Division where you would like to insert the document, click the [Add] button, and then click [MS Word Document]:
The screen will appear like this, ready for you to load the document of your choice:
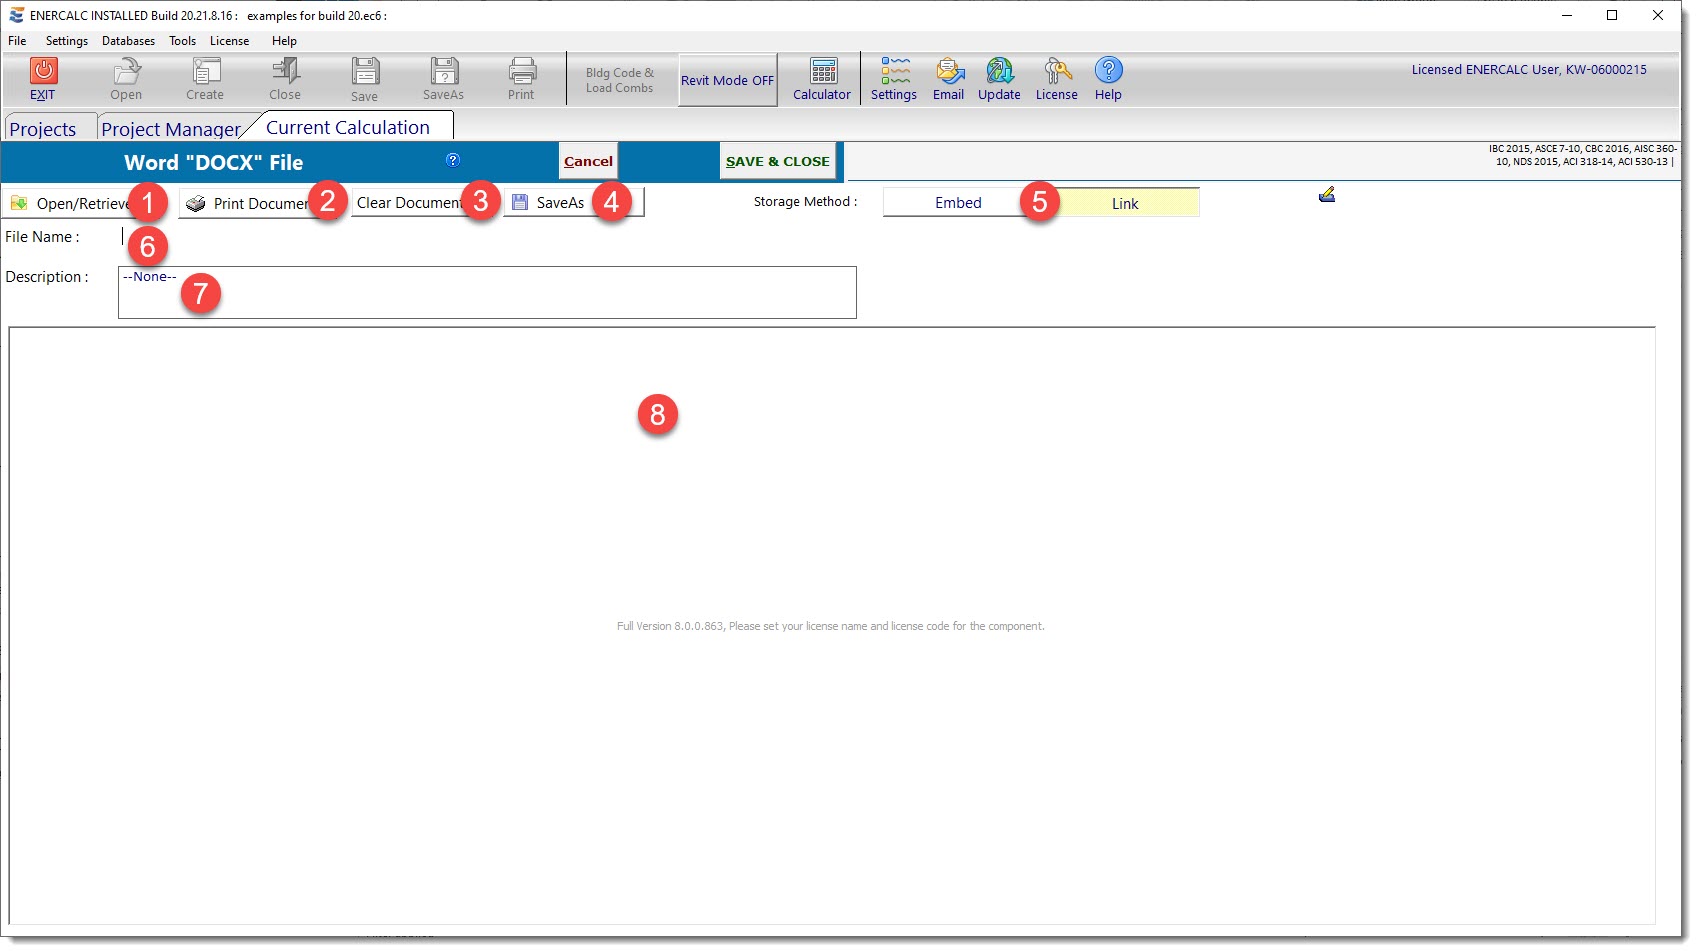
(1) Use the [Open/Retrieve] button to load the desired Word document.
(2) Use the [Print Document] button to print this item using the Word printing functionality.
(3) Use the [Clear Document] button to delete the currently loaded Word document from the Project File.
(4) Use the [SaveAs] button to save the currently loaded Word document to a new filename.
(5) The Storage Method buttons are used to specify how the Word document will be stored for use within ENERCALC.
•[Embed] saves a copy of the item in the Project File. (Easiest for portability, results in larger Project File size, changes to original item will not be visible.)
•[Link] saves a link to the item in Project File. (Changes to original item will be visible, keeps Project File size small, not easily portable.)
(6) This area is used to define the name of the Word document when it is stored externally from the Project File.
(7) Enter a description of this item as needed. It will be displayed in the Descriptions column of the Project Manager for reference.
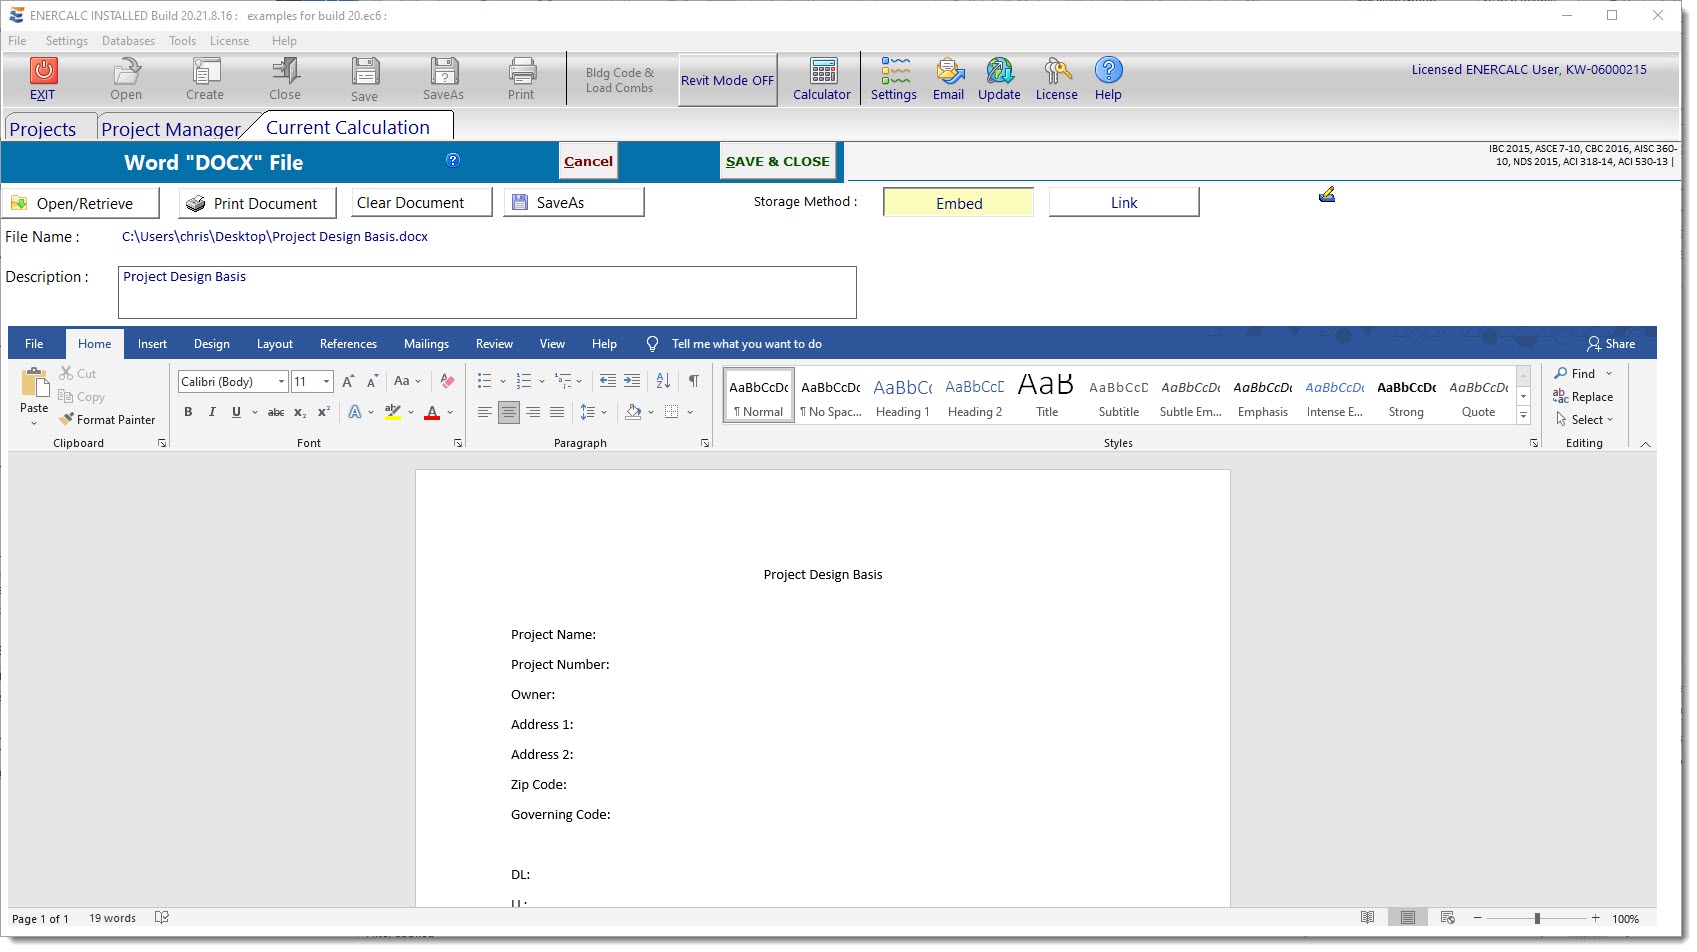
(8) This is the area where the Word document is loaded, as shown below:
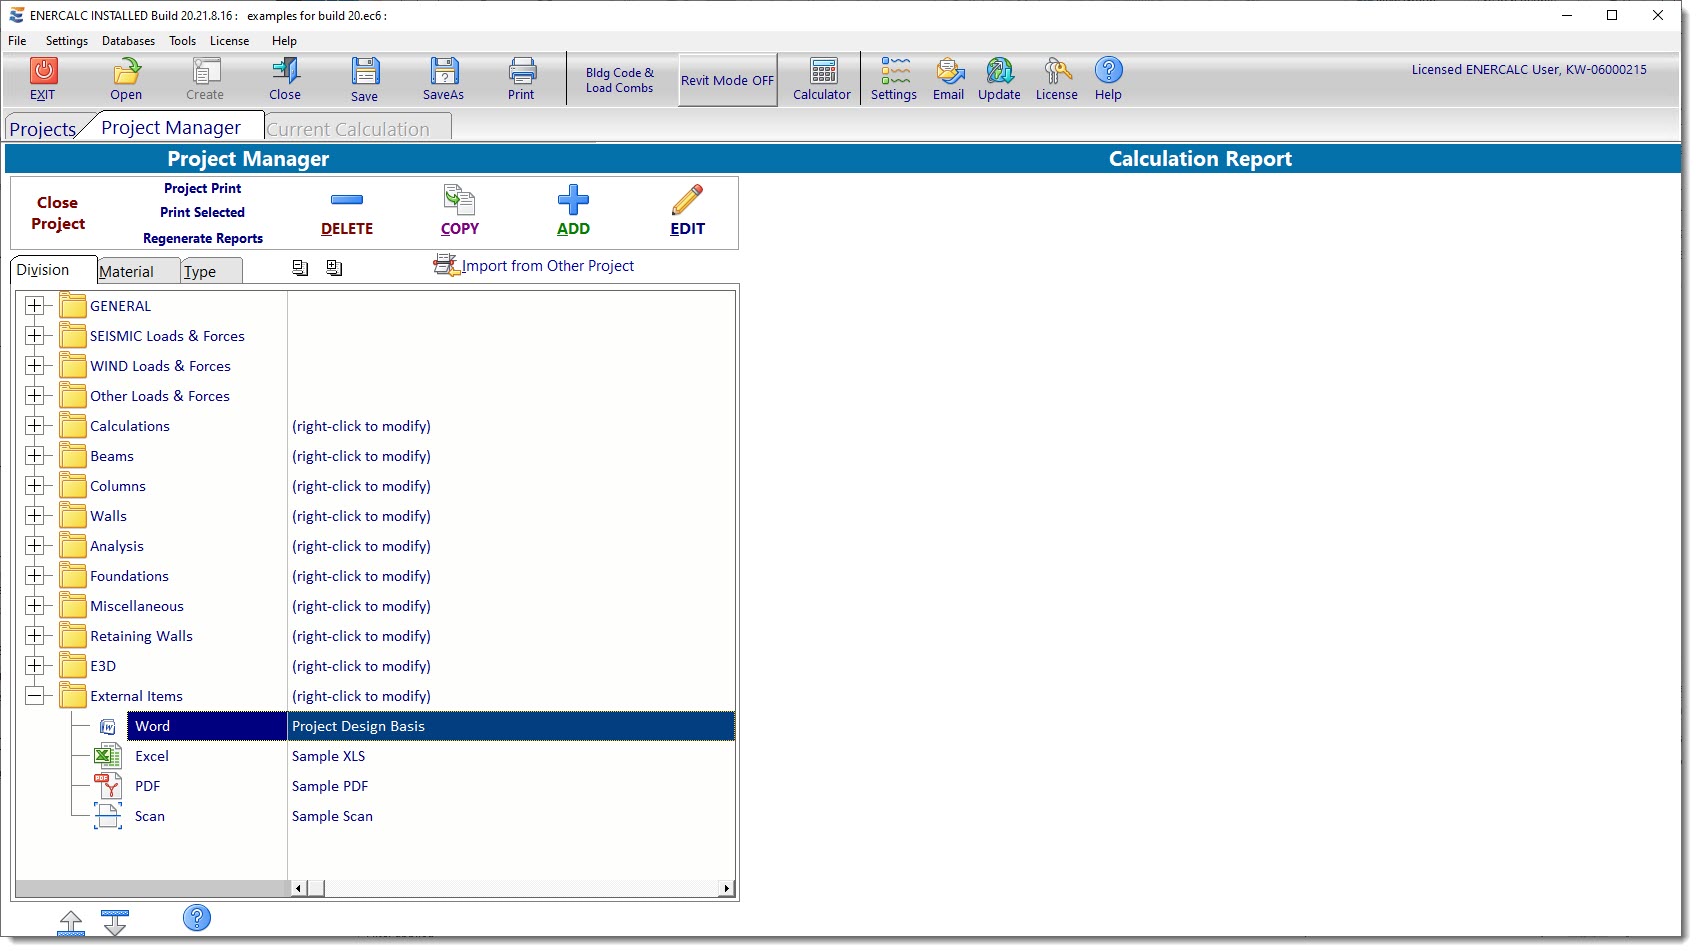
The last step is to click the [Save & Close] button. The display will return to the Project Manager, and you will see an indication that the selected document has been attached as shown in the image below:
 <
<